
I love Winter. I love the snow and even the blizzards (it's exciting!). I love the sight of the snow-covered city and the sight of people bundled up head to toe. But if there's one thing I can't stand about winter time, it's that it gets pitch black by 5:00 pm. The shortened day killllls me. I hate walking home at 5:30 PM feeling like it's 10 PM. By the time I'm home and cooking dinner, there isn't even a trace of the sun. This also greatly effects my window of opportunity for food photography, as I greatly dislike taking photos in the evening with tungsten light.

Being able to bask in (and take food photos in) sunlight is a rare opportunity and this luckily, this Saturday was a beautiful one with plenty of sunshine. So when I woke up, I started the day with a mission. I promised I'd spend my day to make something really delicious and take a gazillion photos of it. I flipped through cookbooks, bookmarks, various blogs and food sites to find the right recipe. I wanted something some-what time-consuming to take full benefit of my free Saturday and something refreshingly different than what I've made here before. And there I saw it: Toasted Almond Dacquoise.

I've had this cake at a birthday celebration before, made from Dufflet Pastries and I was blown away. I loved the delightful texture of the chewy/crunchy meringue and the pleasantly un-sweet berry-licious whipped cream filling. I knew I wanted to make it when I took a bite out of it, so when I saw a recipe that alluded to this cake, I instantly knew it was the one! I also happened to have a jar full of almonds and a container of berries in my refrigerator. Perfect!
The dacquoise is delightful cake layer that is used in a lot of fancy cakes, but don't be fooled by it's harsh sounding name – it's so easy to make! I found this wonderful recipe from Zoe Bakes and I think she describes it perfectly! "It's a light meringue that has nuts folded into it and baked in a thin layer. The dacquoise is crisp and used to add a sweet, nuttiness to your cakes. I love the contrast of a dacquoise with a soft sponge cake and a fruit mousse in the summer or with layers of rich chocolate in cooler weather." Are you in love yet?
(And this time, I had a whole day to bake so I made it a good one. Here's a step-by-step photo post for you!)

This recipes calls for almond meal, and you're free to buy them that way, but you can also just make your own. I happened to have almonds at home, so I toasted them (to make them more fragrant and delicious) for just about 8 minutes or so in a preheated oven at 350F. When cool, I grounded them in a blender/chopper.

Next step is to preheat the oven to 225F and prepare your baking tray. Prepare sheets of parchment paper by drawing circles that match the size of the cake you are going to bake. The original recipe was for a 9-inch cake and so she used a cake cardboard round, but I wanted to make cute single-serve desserts so I used a glass instead.
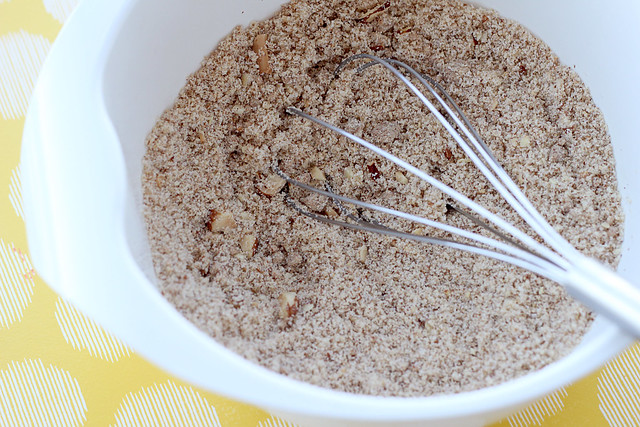
In a small bowl, mix the almond meal and 1/4 cup of sugar. Set aside. (I know you can see big chunks of almond here. I know it should be almond MEAL, but I actually liked having almond chunks in my cake before, so I kept a few in there.)
Now, it's time to whip the egg whites. A few tips here:
1. You probably need some sort of electronic mixer for this. I don't doubt you have the muscle-strength to whip eggs into its voluptuous state, but it's just really really hard work. It doesn't have to be stand mixer, though. I hand-held mixer is perfect.
2. Make sure your bowl is completely clean. Any traces of yolk, fat or soap, and these babies won't rise.
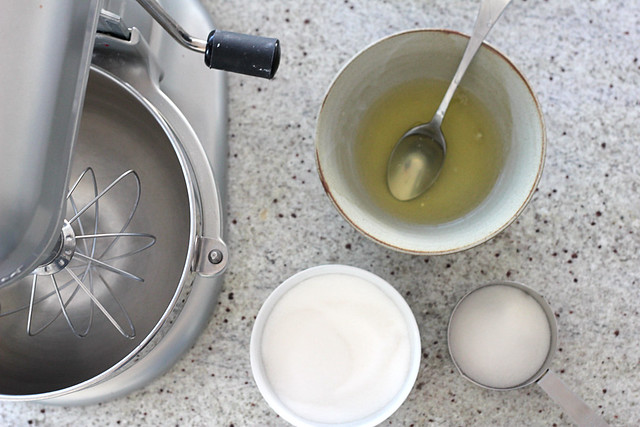
3. Have all the ingredients set out and ready. You want a steady and smooth transition when you're adding sugar and such, so it's great to have it all ready by your mixing bowl instead of letting the air die down while you prepare your next cups of sugar.

Whip the egg whites on low speed until they start to foam, about 45 seconds. Add the 2 tablespoons sugar to the whites and continue to whip on medium speed until soft peaks form. Once the whites form soft peaks slowly add the 2/3 cup sugar and continue whipping until stiff peaks are formed and the sugar, about 2 minutes.
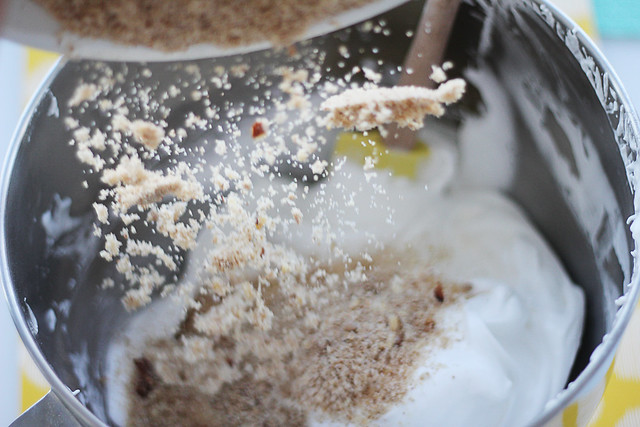

Time to whip out your spatula. Add the almond meal in two batches, folding them in gently after each addition. Don't overbeat! Fold in only until the almond meal is well distributed. You know your proper "folding" technique, right? Cut down the middle, scoop around the edge, rotate the bowl and repeat!

Now, you need a pastry bag fitted with a large round tip (or in my case, no tip at all – I couldn't find mine) and fill it with the dacquoise. The fun part: pipe spirals to fill the circles you've drawn on the parchment. It should be around 1/8" - 1/4" thick.
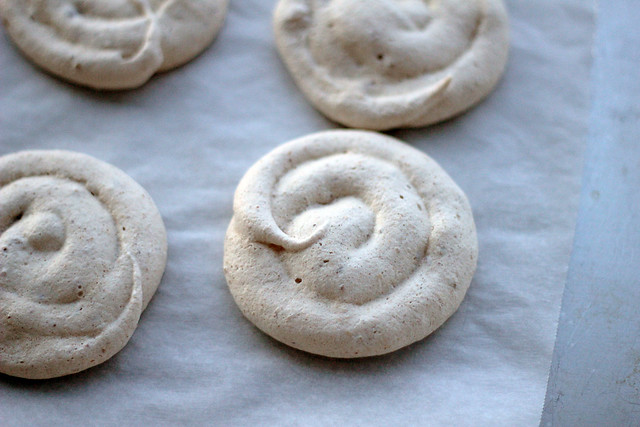
The hard part: Bake the dacquoise at 225° until dry, about 65-85 minutes. (My little circles took around 70 minutes.) Why is it hard? That hour and a bit feels like forever when you're smelling the delicious almond meringue cooking in the oven! You can use this almond dacquoise recipe in a whole lot of delicious little desserts. I hope to try different cakes with this recipe! Oh, and did I tell you that this treat is gluten-free? This meringue-based cake is a great alternative to flour cakes!!

When your dacquoise layer is baked, let it cool on a rack. It's time to make delicious whipped cream with berries! Make sure your heavy cream is cold and straight out of the fridge. You're just going to whip the cream with a dash of pure vanilla extract and when it starts to hold shape, add about 3 tablespoons of powdered sugar (add and subtract depending on how sweet you want it). I like mine whipped to its hardest peak, just try not to curdle it! Fold in your berries and voila – your delicious berry whipped cream.
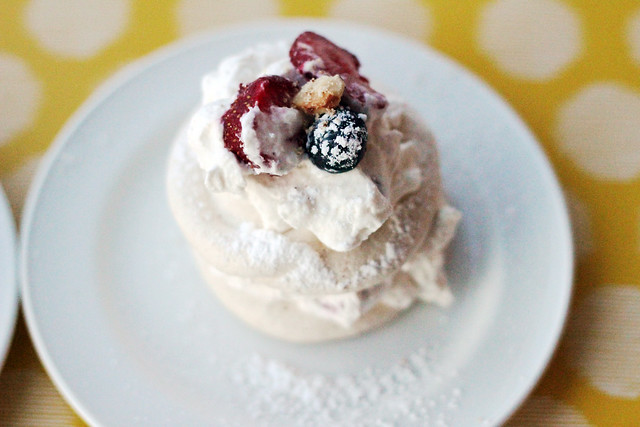
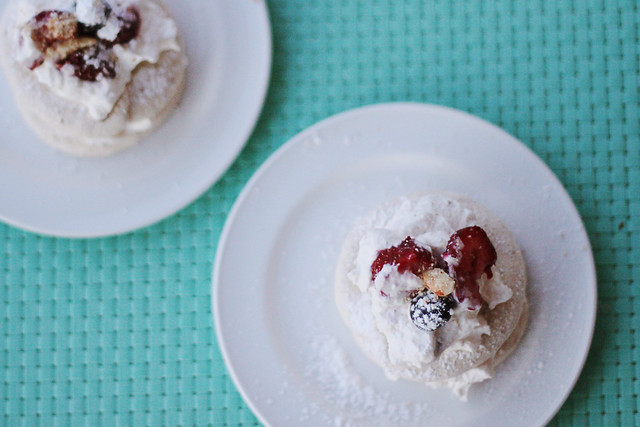
For my little treat cakes, I sandwiched two pieces of dacquoise between the cream, with more cream and berries on top. I even sprinkled some almond meal and dusted it with powdered sugar for extra prettiness. :)
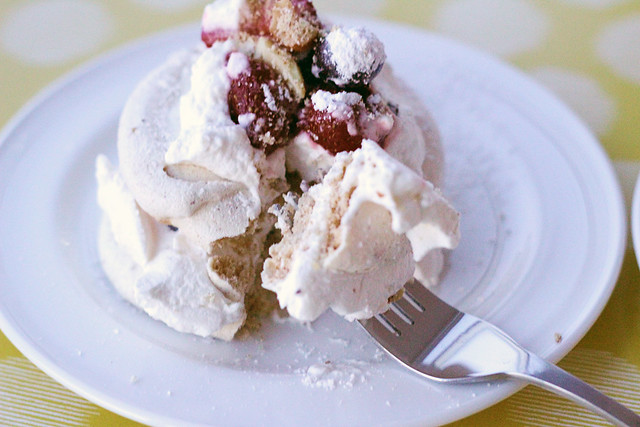
So there it is! A very delicious delicious dessert that I know you'll love as much as we did at home. After one bite, Andrew asked me, "Do you have any more? I think this is the best thing I've had in a loong time!" It was soo delicious!
And yes yes - this is more of a summer treat, what, with the berries and whipped cream and all. It's not quite fitting with the winter season, but think of it this way: how brilliant is it when you can create a bit of sunshine in your own kitchen? Cheers!
Toasted Almond Dacquoise with Berry Whipped Cream
ingredients
2/3 cups almond meal (1/3 cup whole almonds, finely ground)
1/4 cup sugar
2/3 cups egg whites (about 5 large)
2/3 cups + 2 tablespoons sugar (separate)
2 1/2 cups heavy cream, cold
1 teaspoon pure vanilla extract
3 tablespoon powdered sugar
2 cups fresh berries (you can also use frozen fruit)
1/4 cup sugar
2/3 cups egg whites (about 5 large)
2/3 cups + 2 tablespoons sugar (separate)
2 1/2 cups heavy cream, cold
1 teaspoon pure vanilla extract
3 tablespoon powdered sugar
2 cups fresh berries (you can also use frozen fruit)
directions
1. Toast whole almonds in a preheated oven at 350°F for 8 minutes. Grind them finely in a food processor or blender/chopper
2. Prepare parchment paper by drawing circles that match the size of the cake you are going to bake. In my case I used a small glass. Preheat the oven to 225°.
3. In a small bowl, mix the almond meal and 1/4 cup sugar and set aside.
4. Whip the egg whites on low speed in a mixer until they start to foam, about 45 seconds. Add the 2 tablespoons sugar to the whites and continue to whip on medium speed until soft peaks form. Once the whites form soft peaks slowly add the 2/3 cup sugar and continue whipping until stiff peaks are formed and the sugar, about 2 minutes.
5. Add the almond meal in two batches, folding them in gently after each addition. Make sure you only fold until almond meal is well-distributed.
6. Place the dacquoise in to a pastry bag fitted with a large round tip. Pipe in a large spiral until you have filled in the circles drawn on the parchment. it should be about an 1/8″ thick.
7. Bake the dacquoise at 225° until dry, about 65-85 minutes. Place on rack to cool.
For the cream:
1. In a mixer with a whisk attachment, whip heavy cream with vanilla extract until it starts to hold shape. Pour powdered sugar and add more to taste.
2. Add berries and fold until well-incorporated.
Assemble with prepared dacquoise, adding pretty details like powdered sugar and almond bits.


Looks fantastic, Sarah! :)
ReplyDeleteAHHHH looks so good.
ReplyDeleteThanks so much for stopping by! I love your blog too!! I've never made dacquoise, but it looks right up my alley as I love meringues. Gotta try this next...
ReplyDeletegreat post sarah :) i totally want to make this... really like your first photo, with the coloured placemats!
ReplyDelete@karen + @alicia: you must you must you must!! it's sooooo easy and sooooo delicious!!!
ReplyDeleteoh em gee... these look amaaaazing!!!!! I especially love the action shot of the almond meal - I have the hallelujah chorus ringing in my mind as I see that. lol
ReplyDeleteYou are seriously an amazing cook, woman!! :D
If a man does not make new acquaintances as he advances through life, he will soon find himself alone. A man should keep his friendships in constant repair.
DeleteLocksmith Washington DC
This is my favourite cake! I am going to try and find the time to make this soon!
ReplyDeleteThanks Sarah!!!
Made it...and it was tres tres yummy!
ReplyDeleteIt was also given the stamp of approval from all my guests yesterday!
http://amandaandlola.blogspot.com/2012/03/sunday-sushi.html
xx
The positive comments and do well wishes are very motivational and greatly appreciated.
ReplyDeletemovers washington dc
A good laugh makes us better friends with ourselves and everybody around us.
DeleteLocksmith Washington DC
This is such a great post, and was thinking much the same myself. Another great update.
ReplyDeletedc movers
Slow but stable victories the competition.
ReplyDeleteDC Locksmith
This is my second time making this! I sought out the recipe after my favorite restaurant quit offering it as a dessert option.this fits the bill almost exactly!! The only things I change are not to roast the almonds(I prefer them raw) and to add a drizzle of butterscotch to the finish product.
ReplyDeleteSo glad you like the recipe! I totally had the same experience - I tried the cake somewhere and I knew I just HAD to make it at home. I haven't tried raw almonds, but sounds like a great idea! Maybe next time I'll leave them raw. :) Thanks for hanging out!
Delete