milk&honey cafe

Showing posts with label fruit. Show all posts

Monday, January 23, 2012

Craving the Sun

Toasted Almond Dacquoise with Sweet Berry Cream

I love Winter. I love the snow and even the blizzards (it's exciting!). I love the sight of the snow-covered city and the sight of people bundled up head to toe. But if there's one thing I can't stand about winter time, it's that it gets pitch black by 5:00 pm. The shortened day killllls me. I hate walking home at 5:30 PM feeling like it's 10 PM. By the time I'm home and cooking dinner, there isn't even a trace of the sun. This also greatly effects my window of opportunity for food photography, as I greatly dislike taking photos in the evening with tungsten light.

View from my kitchen

Being able to bask in (and take food photos in) sunlight is a rare opportunity and this luckily, this Saturday was a beautiful one with plenty of sunshine. So when I woke up, I started the day with a mission. I promised I'd spend my day to make something really delicious and take a gazillion photos of it. I flipped through cookbooks, bookmarks, various blogs and food sites to find the right recipe. I wanted something some-what time-consuming to take full benefit of my free Saturday and something refreshingly different than what I've made here before. And there I saw it: Toasted Almond Dacquoise.

Toasted Almond Dacquoise with Sweet Berry Cream

I've had this cake at a birthday celebration before, made from Dufflet Pastries and I was blown away. I loved the delightful texture of the chewy/crunchy meringue and the pleasantly un-sweet berry-licious whipped cream filling. I knew I wanted to make it when I took a bite out of it, so when I saw a recipe that alluded to this cake, I instantly knew it was the one! I also happened to have a jar full of almonds and a container of berries in my refrigerator. Perfect!

The dacquoise is delightful cake layer that is used in a lot of fancy cakes, but don't be fooled by it's harsh sounding name – it's so easy to make! I found this wonderful recipe from Zoe Bakes and I think she describes it perfectly! "It's a light meringue that has nuts folded into it and baked in a thin layer. The dacquoise is crisp and used to add a sweet, nuttiness to your cakes. I love the contrast of a dacquoise with a soft sponge cake and a fruit mousse in the summer or with layers of rich chocolate in cooler weather." Are you in love yet?

(And this time, I had a whole day to bake so I made it a good one. Here's a step-by-step photo post for you!)

Toasted Almond Daquoise with Sweet Berry Cream

This recipes calls for almond meal, and you're free to buy them that way, but you can also just make your own. I happened to have almonds at home, so I toasted them (to make them more fragrant and delicious) for just about 8 minutes or so in a preheated oven at 350F. When cool, I grounded them in a blender/chopper.

Toasted Almond Dacquoise with Sweet Berry Cream

Next step is to preheat the oven to 225F and prepare your baking tray. Prepare sheets of parchment paper by drawing circles that match the size of the cake you are going to bake. The original recipe was for a 9-inch cake and so she used a cake cardboard round, but I wanted to make cute single-serve desserts so I used a glass instead.
Toasted Almond Dacquoise with Sweet Berry Cream

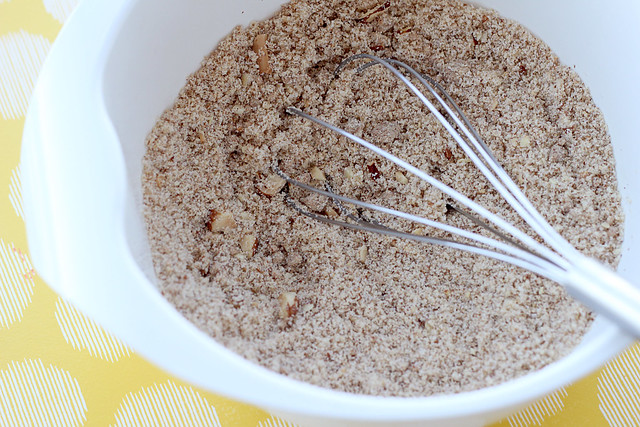
In a small bowl, mix the almond meal and 1/4 cup of sugar. Set aside. (I know you can see big chunks of almond here. I know it should be almond MEAL, but I actually liked having almond chunks in my cake before, so I kept a few in there.)
Toasted Almond Dacquoise with Sweet Berry Cream

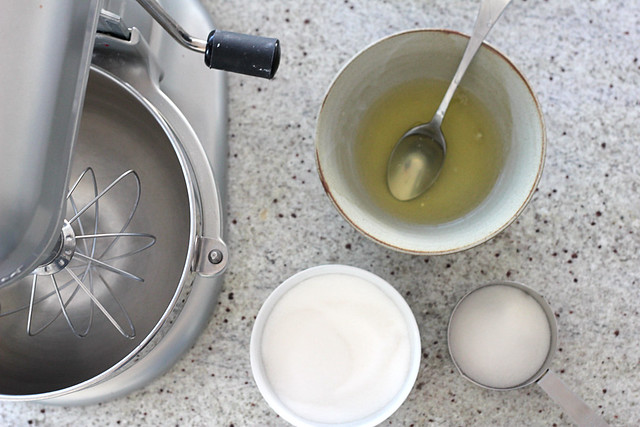
Now, it's time to whip the egg whites. A few tips here:
1. You probably need some sort of electronic mixer for this. I don't doubt you have the muscle-strength to whip eggs into its voluptuous state, but it's just really really hard work. It doesn't have to be stand mixer, though. I hand-held mixer is perfect.
2. Make sure your bowl is completely clean. Any traces of yolk, fat or soap, and these babies won't rise.
3. Have all the ingredients set out and ready. You want a steady and smooth transition when you're adding sugar and such, so it's great to have it all ready by your mixing bowl instead of letting the air die down while you prepare your next cups of sugar.

Beating Meringue

Whip the egg whites on low speed until they start to foam, about 45 seconds. Add the 2 tablespoons sugar to the whites and continue to whip on medium speed until soft peaks form. Once the whites form soft peaks slowly add the 2/3 cup sugar and continue whipping until stiff peaks are formed and the sugar, about 2 minutes.
Toasted Almond Dacquoise with Sweet Berry Cream

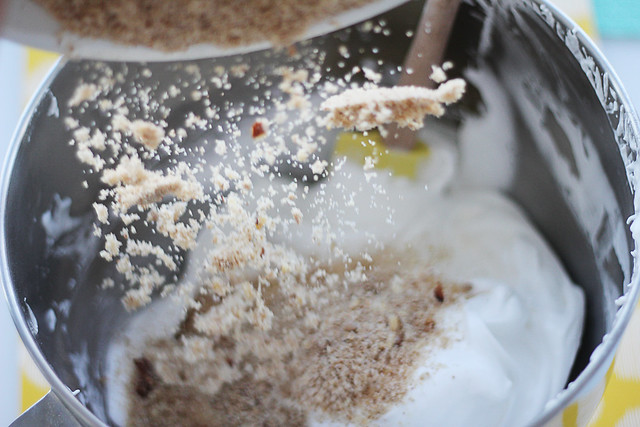
Time to whip out your spatula. Add the almond meal in two batches, folding them in gently after each addition. Don't overbeat! Fold in only until the almond meal is well distributed. You know your proper "folding" technique, right? Cut down the middle, scoop around the edge, rotate the bowl and repeat!

Toasted Almond Dacquoise with Sweet Berry Cream

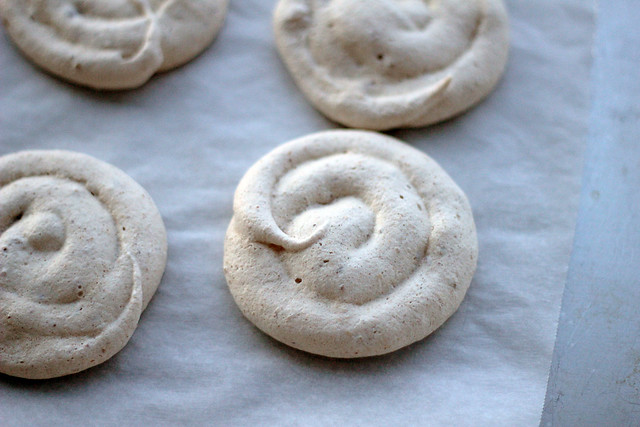
Now, you need a pastry bag fitted with a large round tip (or in my case, no tip at all – I couldn't find mine) and fill it with the dacquoise. The fun part: pipe spirals to fill the circles you've drawn on the parchment. It should be around 1/8" - 1/4" thick.
Toasted Almond Dacquoise with Sweet Berry Cream

The hard part: Bake the dacquoise at 225° until dry, about 65-85 minutes. (My little circles took around 70 minutes.) Why is it hard? That hour and a bit feels like forever when you're smelling the delicious almond meringue cooking in the oven! You can use this almond dacquoise recipe in a whole lot of delicious little desserts. I hope to try different cakes with this recipe! Oh, and did I tell you that this treat is gluten-free? This meringue-based cake is a great alternative to flour cakes!!
Toasted Almond Dacquoise with Sweet Berry Cream

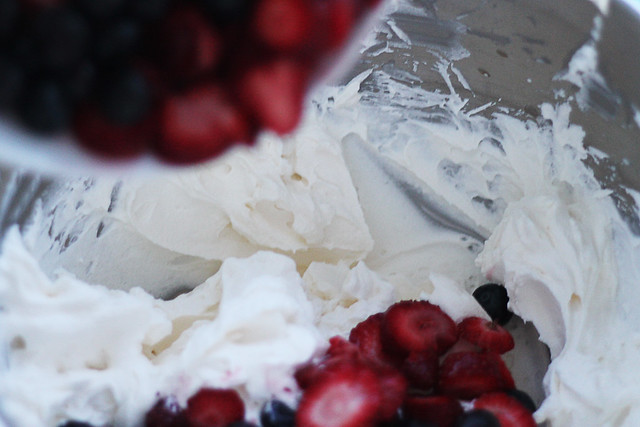
When your dacquoise layer is baked, let it cool on a rack. It's time to make delicious whipped cream with berries! Make sure your heavy cream is cold and straight out of the fridge. You're just going to whip the cream with a dash of pure vanilla extract and when it starts to hold shape, add about 3 tablespoons of powdered sugar (add and subtract depending on how sweet you want it). I like mine whipped to its hardest peak, just try not to curdle it! Fold in your berries and voila – your delicious berry whipped cream.
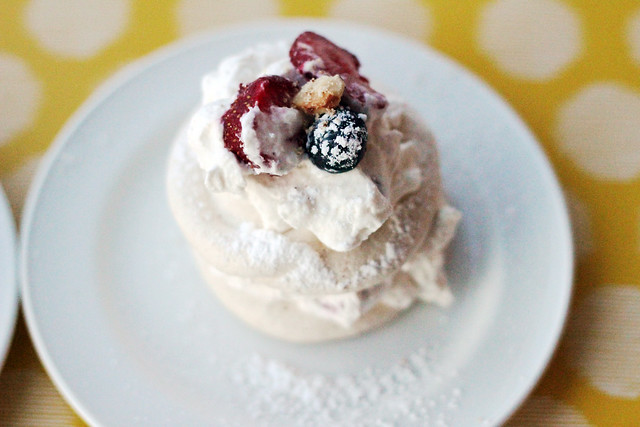
Toasted Almond Dacquoise with Sweet Berry Cream

For my little treat cakes, I sandwiched two pieces of dacquoise between the cream, with more cream and berries on top. I even sprinkled some almond meal and dusted it with powdered sugar for extra prettiness. :)
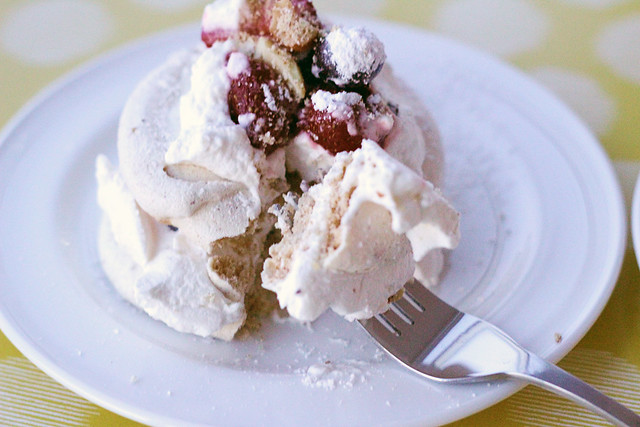
Toasted Almond Dacquoise with Sweet Berry Cream

So there it is! A very delicious delicious dessert that I know you'll love as much as we did at home. After one bite, Andrew asked me, "Do you have any more? I think this is the best thing I've had in a loong time!" It was soo delicious!

And yes yes - this is more of a summer treat, what, with the berries and whipped cream and all. It's not quite fitting with the winter season, but think of it this way: how brilliant is it when you can create a bit of sunshine in your own kitchen? Cheers!
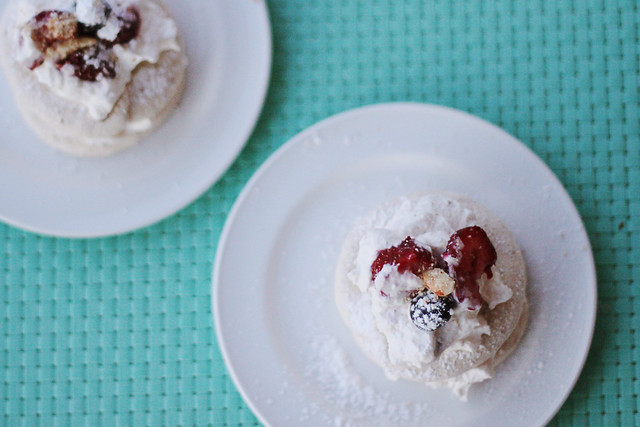
Toasted Almond Dacquoise with Sweet Berry Cream

Toasted Almond Dacquoise with Berry Whipped Cream
makes 9 little cakes or one 9" cake
recipe adapted from Zoe Bakes

ingredients
2/3 cups almond meal (1/3 cup whole almonds, finely ground)
1/4 cup sugar
2/3 cups egg whites (about 5 large)
2/3 cups + 2 tablespoons sugar (separate)

2 1/2 cups heavy cream, cold
1 teaspoon pure vanilla extract
3 tablespoon powdered sugar
2 cups fresh berries (you can also use frozen fruit)

directions
1. Toast whole almonds in a preheated oven at 350°F for 8 minutes. Grind them finely in a food processor or blender/chopper
2. Prepare parchment paper by drawing circles that match the size of the cake you are going to bake. In my case I used a small glass. Preheat the oven to 225°.
3. In a small bowl, mix the almond meal and 1/4 cup sugar and set aside.
4. Whip the egg whites on low speed in a mixer until they start to foam, about 45 seconds. Add the 2 tablespoons sugar to the whites and continue to whip on medium speed until soft peaks form. Once the whites form soft peaks slowly add the 2/3 cup sugar and continue whipping until stiff peaks are formed and the sugar, about 2 minutes.
5. Add the almond meal in two batches, folding them in gently after each addition. Make sure you only fold until almond meal is well-distributed.
6. Place the dacquoise in to a pastry bag fitted with a large round tip. Pipe in a large spiral until you have filled in the circles drawn on the parchment. it should be about an 1/8″ thick.
7. Bake the dacquoise at 225° until dry, about 65-85 minutes. Place on rack to cool.

For the cream:
1. In a mixer with a whisk attachment, whip heavy cream with vanilla extract until it starts to hold shape. Pour powdered sugar and add more to taste.
2. Add berries and fold until well-incorporated.

Assemble with prepared dacquoise, adding pretty details like powdered sugar and almond bits.

Saturday, September 18, 2010

And..... we're back.

"You just gotta start somewhere!" That's what I kept telling myself every time I sat in front of the computer to write a blog entry. So much stuff has gone on that I don't even know where to start! It's just like when I approach any kind of written assignment. It's too overwhelming, I don't know where to start. But like the good advice that my sister gives me each time, "Just start writing!", here it goes.

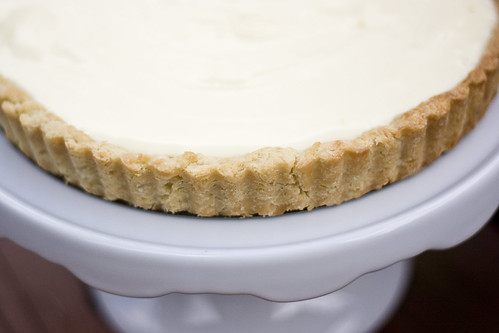
Lemon Cream Tart

1. The big stuff. Guess what guys. This is big. I quit my job. But before you start thinking that I'm crazy for leaving a perfect job at a fantastic design agency, just understand that it didn't come easy. It wasn't about the job — I'm changing careers. It was a huge decision, but I've made it and now I'm committed to it. I've decided that I want to pursue my aspirations of becoming a TEACHER! And now I'm back in school so that I can apply for teacher's college.

My Oxygen Desk
My beloved desk at my studio. I'll miss you!!

2. The cheesy stuff. Just in case you were wondering, Andrew and I are doing very well. We're very much growing and enjoying our lives together. It's been an amazing year and a half and we're both really excited to see where tomorrow will take us!

sandrew
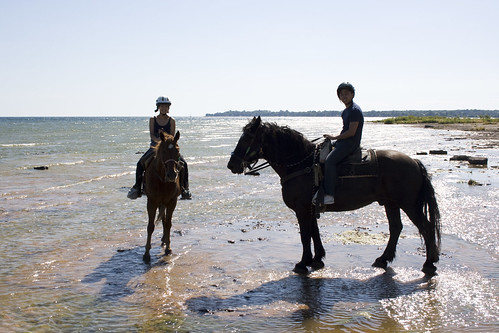
Look where Andrew took me for my birthday!! We went on a private horse trail riding!! He surprised me for my birthday and I had SUCH a great time. :) On a side note: Do you like our dinky little helmets? Ha!!

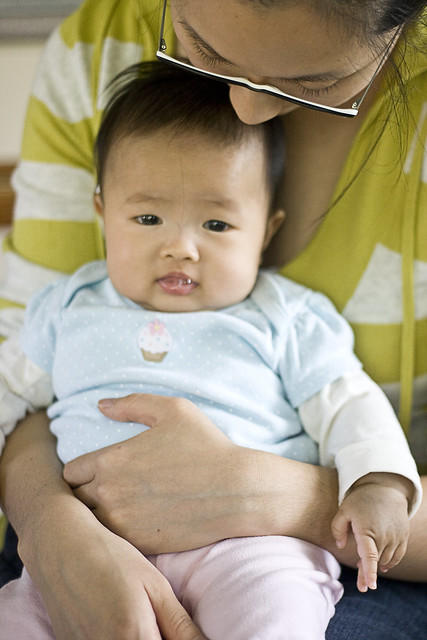
3. The cute stuff. My little niece, Chloe is honestly, the cutest, most lovable thing on EARTH. It's so beautiful and incredible to see new life. Really, the most amazing thing to experience all these "firsts" with a new baby. Each time she laughs, it's like the whole place lights up and in truth, it seems like she's playing with us rather than us playing with her. I'm so grateful for her and her parents. I miss her everyday!!

my love, Chloe Lee

my love, Chloe Lee

my love, Chloe Lee

4. The grateful stuff. Honestly, everyone. I'm so grateful for your patience and encouragement over the few months. I'm sorry I've been so MIA but I'm amazed at how you still look forward to my blog entries!! It's really unbelieveable how warm and kind you all are. Thank you thank you thank you. You inspire me and motivate me!
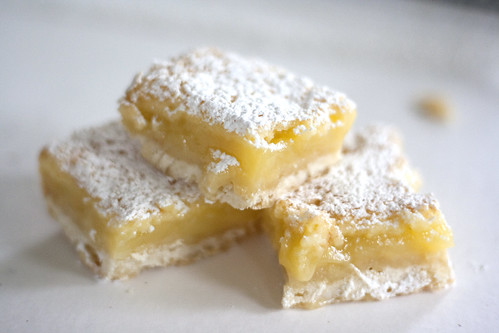
Lemon Cream Tart
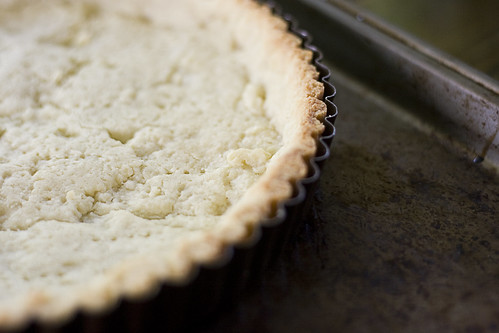
Grateful for this tart pan! My friend gave me a williams-sonoma certificate for my birthday. You girls know exactly what I need/want. Hehe.

5. The delicious stuff. Yes yes it's the moment you've been all waiting for. Sometimes I feel bad when I write too much on my life etc., because I know you're thinking, "Okay.. now on with the food please!!!" Like I promised and you've proposed, I made the delicious French Lemon Cream Tart, courtesy of Dorie Greenspan. It was a recipe you really need to invest your time and heart in, but very much worth it.

Lemon Cream Tart

Lemon Cream Tart

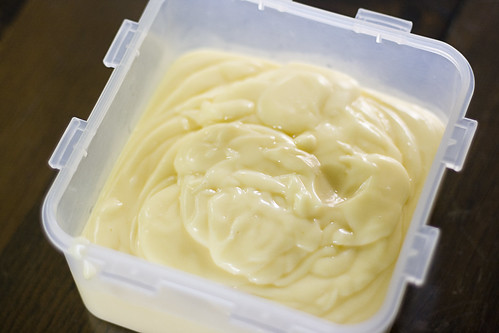
The cream is truly extraordinary. It's marvelously smooth and velvety, with the perfect amount of sweet and tart. But to be honest, it was a challenging recipe for me this time. I was soo surprised and a bit disappointed to see how rusty I got. Man! Not baking and photographing for months really takes a toll on ya! Not going to lie, I'm not totally happy with the execution and the photography this time. I hope you can forgive me! Hopefully I'll get back on track soon.

Lemon Cream Tart

Lemon Cream Tart

But it was still really delicious and dorie's recipe was 100% fantastic. Unfortunately, I decided that I wouldn't post up recipes from books because it violates copyright. I know I've done it before but I now decided not to. But I wouldn't be surprised if you could find it easily on the internet. Also, I strongly encourage you to make that investment in her Cookbook "From my home to yours" as it's a staple for any baker filled with some of the best recipes you'll ever find.

UPDATED: Okay okay okay. I'll post up the recipe! It wasn't like me anyway. Haha. So instead, I have paraphrased her recipe! Hope it's not too choppy, or I haven't gotten too chatty. Nevertheless, still look at investing in her cookbook. It's really an amazing book!

Most Extraordinary French Lemon Cream Tart

recipe from "Baking: From My Home to Yours" by Dorie Greenspan


ingredients

1 cup sugar
grated zest of 3 lemons
4 large eggs
3/4 cup fresh lemon juice (from 4-5 lemons)
2 sticks plus 5 tbsp (10 1/2oz) unsalted butter, cut into tbsp-size pieces, at room temp
1 9-inch tart shell made with sweet tart dough (I used an allrecipes recipe because Dorie's recipe only asks for a super pulsing food processor, which I don't have. You can just use your favourite sweet tart dough!)


directions


1. You need an instant-read thermometer, strainer, and a blender ready. Bring a few inches of water to a simmer in a saucepan.

2. Before setting over the simmering water, in a large heatproof bowl, rub the sugar and lemon zest together between your fingers until the sugar is moist, grainy and very aromatic. Whisk in the eggs, followed by the lemon juice.

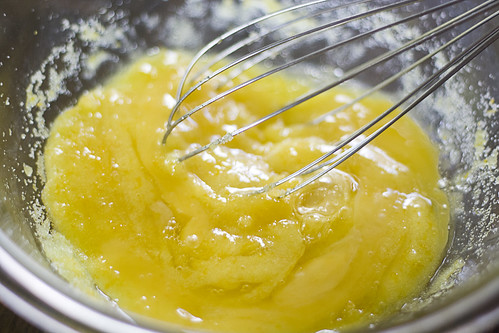
3. Now set the bowl over the pan and start stirring with the whisk as soon as the mixture feels lukewarm to touch. You'll need to slowly cook the lemon cream until it reaches 180F. It's important that you whisk constantly to prevent scrambled eggs.

As you keep whisking, the cream will start out light and foamy, then the bubbles will get bigger. Watching carefully as the temperature rises closer to 180F, it will become thicker and the whisk will leave tracks. You're ALMOST there! Don't stop whisking or checking the temperature but most importantly, be patient! Depending on how much heat you're giving the cream, getting it to 180F might take as long as 10 minutes (or 15 for me!)

4. As soon as it reaches 180F, remove the cream from the heat and strain it into the container of the blender; discard the zest. Let the cream stand, stirring occasionally, until it cools to 140F, about 10 minutes.

5. With the blender on HIGH, add the butter about 5 pieces at a time. Scrape down sides and make sure the butter is incorporated. (Mine just sat there on top of the cream if I didn't do this). Once the butter is mixed, keep the machine going. This will be the heavenly path to divine lightness, airy texture of "lemon-cream dreams" (that's her word). Continue to blend the cream for another 3 minutes, working in intervals if your blender gets overheated.

6. Before you pour the cream into a container, take a scoop with a new spoon and eat it. And savour it. And relish it. (This is my own line).

7. Now pour the cream into a container, pressing a piece of plastic wrap right against the surface of the cream. This creates a super airtight seal. Refrigerate for at least 4 hours or overnight. (Wow! FOUR+ hours to wait. See, aren't you glad you followed instruction #6?). The cream will keep in the fridge for 4 days or, tightly sealed, up to 2 months in the freezer. You'll just have to thaw it overnight in the fridge.

7. When you are ready to assemble the tart, just whisk the cream to loosen it and spoon it in the tart shell. Serve the tart, or refrigerate until needed.


Lemon Cream Tart

Thursday, March 25, 2010

Got 5 minutes?

sauteed bananas with vanilla and ice cream

Then you can make this delicious and easy dessert! (Watch me publish this post in 5 minutes!)

sauteed bananas with vanilla and ice cream

VOILA!

sauteed bananas with vanilla and ice cream

Easiest recipe ever. But what a heavenly dessert. The warm, fragrant banana combined with the cold, smooth ice cream will make you sway. Guaranteed. (It also happens to be one of Andrew's favorite desserts. And that's saying a lot, 'cause he's had a lot of my recipes.)

Sauteed Vanilla Bananas with Ice cream


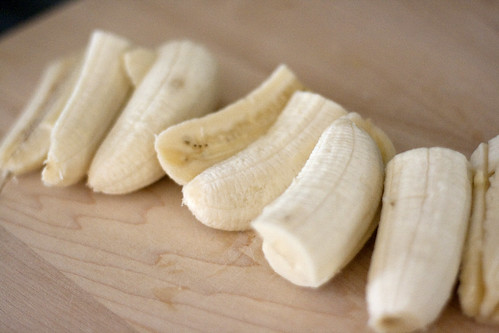
Add 2 tbsp of unsalted butter onto a non-stick pan. When completely melted and bubbly, add vanilla seeds scraped from one vanilla pod. Quickly add 4 quartered bananas, cut-side down. Flip bananas when golden and cook other side, about 3 minutes. Serve with your favourite ice cream – I used Häagen-Dazs caramel cone ice cream. YUM. Serves 4.


Now, go make it!

Tuesday, October 27, 2009

To come full circle

blueberry pie

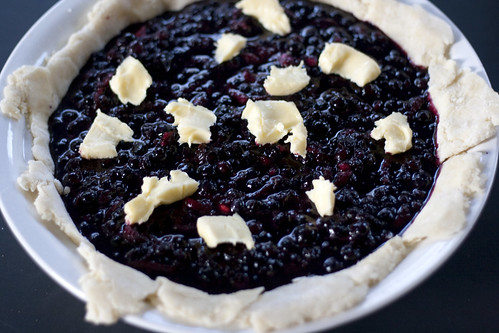
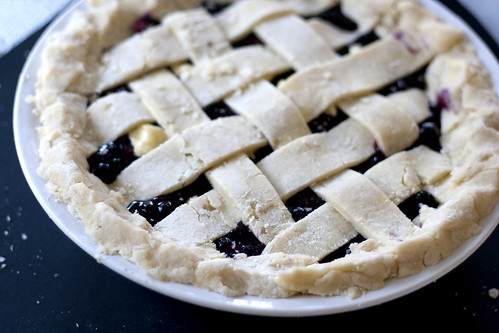
Okay guys. This is going to be speed-blogging. I'm at work and I got ten minutes until it's 9 am. I know I shouldn't really be doing personal stuff here, but gosh darnit, it's been too long since I've put anything up here! And I've got two perfectly fine pies waiting to be posted up. So this is going to be quick and dirty: two pies, two successes.

my very first apple pie

This season was my first time to try pies. Can you believe it? After calling myself sarah the baker yoon for quite some time, it was quite embarrassing to admit that I've never tried pies. I never understood why they have the saying "Easy as Pie!" 'cause it seemed like such a challenge to me. I guess it was always the fear of failure but I've finally come full circle in my pie-angst and I've dealt with it. And what a great dealing it was.

blueberry pie

Of course the challenge with a great pie is inevitably the crust. Fillings don't seem to be such a big deal, but when it comes to the crust — we get quite sensitive. It can't be soggy or stiff or breaking apart or tough. It needs to be perfectly flaky and buttery and crusty in order to be received with much love. But I found that with just the right recipe, a few video tutorials, and a careful touch, it's really quite simple to make the right pie dough.

blueberry pie
my very first apple pie

A few tries wouldn't hurt either, but with luck on my shoulder, I made two great pies for the first time. My apple pie was for Thanksgiving dinner (yes, us Canadians have our Thanksgiving early October) and with a perfect scoop of creamy vanilla ice cream, all I heard was mmmmmm's and ahhhhh's. The second was for my parents' guests and they were so proud of me as all of them devoured the pie together. Now my mom keeps asking "So... Just wondering... how about that pie again?"

blueberry pie
blueberry pie

After trying to find the perfect recipe, Joy of Cooking, Allrecipes, and Dorie's recipes were in consideration, but in the end I was convinced by Cook's Illustrated video tutorial and decided to go with that. And what a great choice it was. They explain scientifically why their dough works and made me a believer. Their secret ingredient in the pie dough is VODKA. A solution to easier rolling, but preventing a tough dough from over-worked gluten from too much water. The vodka burns away in the oven and is tasteless afterward.

how to make pie dough

Also, they give an option for those who don't own a food processor, like me! They have a foolproof way of keeping the butter chunks balanced perfectly with the flour and you can use your stand mixer! The procedure is quite different than of the usual cutting method, but it works wonders. It's the science behind it I guess. So I thought I'd give you a visual step-by-step guide to making a foolproof crust. I always questioned "what exactly do you mean by pea-sized to cheese-curd-sized butter chunks?" So if you were struggling to visualize that, here it is! :D

how to make pie dough

Anyways, I don't have much time (yikes! It's 12 after 9!) So please enjoy the photos for now, and I'll post the recipe when I have the time! Happy pie baking, everyone!!

my very first apple pie
blueberry pie

Sunday, August 23, 2009

Merci Danke Arigato

for a birthday party

Hello wonderful friends! Hmm today is one of those days where I just can't think of something to write about. Other than the fact that I made some deliciously summery cupcakes for a friend's birthday party, I'm drawing a blank here. But there is one thing I wanted to say... THANK YOU!! I know all those celebrity food bloggers get 19280 comments every post, but I'm squealing with joy whenever I get one comment -- it means you guys like me and that's like a super duper feeling.

for a birthday party

I know I've been sorta neglecting my blog lately just being busy n all, but I'm so excited to see that people are still wooed by my baked goodies. And I don't deserve it! :P So I just wanted to give y'all a BIG WARM THANKS and I'm going to try my best to make this an even better blog. Merci danke arigato!

for a birthday party

By the way, I made these new key lime cupcakes and they were really really good. My friend only asked for two things: a summery pair of flavors and green + blue for decoration. She trusted me with the rest of the decision making. And that's all I really needed cuz I got so inspired with that request!! Hahah. As silly as it sounds, the first thing that popped up in my head was the brilliantly coloured sprinkles they sell at bulk barn and from that I decided to go with dark chocolate cake and white billowy frosting, along with a fresh lime cupcake.

for a birthday party

Of course I used my black magic cake for the chocolate cake. And I used an impromptu cream cheese frosting (I originally was going to make simple vanilla buttercream) that I got to halve from the lime cream cheese frosting. The key lime cupcakes weren't actually key lime since I couldn't get my hands on some real Florida key limes but the Mexican limes did the job. I found the recipe from bon appetite. It's a delightful recipe for a delightful cupcake. The limes are definitely a different taste from lemons but equally lovely. Are you a lime-lover? You should give it a try!!

Key Lime Cupcakes

recipe from bon appetite
makes 12 cupcakes


ingredients

CUPCAKES

1 cup all purpose flour
3/4 cup self-rising flour
1/2 cup (1 stick) unsalted butter, room temperature
1 1/4 cup sugar
2 large eggs
2 1/2 tablespoons fresh lime juice
1 tablespoon finely grated lime peel
1/4 teaspoon neon-green food coloring (optional)
3/4 cup buttermilk

FROSTING

1 8-ounce package cream cheese, room temperature
1 1/2 cups powdered sugar
1/2 cup (1 stick) unsalted butter, room temperature
1 tablespoon finely grated lime peel
1/8 teaspoon neon-green food coloring (optional)
1/2 teaspoon vanilla extract


directions

1. Preheat oven to 350°F. Line standard muffin pan with 12 paper liners. Whisk both flours in medium bowl. Beat butter in large bowl until smooth. Add sugar; beat to blend. Beat in eggs 1 at a time, then next 3 ingredients (batter may look curdled). Beat in flour mixture in 3 additions alternately with buttermilk in 2 additions. Fill pan cups 2/3.
2. Bake cupcakes until tester inserted into center comes out clean, 20 to 25 minutes. Cool 10 minutes. Remove from pan; cool.
3. For frosting: Beat all ingredients in medium bowl until smooth. Spread over cupcakes.


for a birthday party

Tuesday, June 16, 2009

California Dreamin'

for cheryl

Actually, this post has nothing to do with the sunny state of California at all - only the fact that I seem to be living in "Cali time" nowadays. What I mean is that my "internal clock" or "Circadian rhythm" is set to three hours later than it should be. When it is midnight here, I feel like it's only 9 pm (which would be the present time for western states/provinces). And so even if midnight is usually my sleep time, I am awake and struggling to fall asleep. By the time it is 3 am, I am finally getting some shuteye. But it's not like I'm not getting any sleep either! I'm waking up at noon (haha!) just as if it is only 9 am! Plus I squeeze in some naps here and there. I've been doing this every day for a week now.

for cheryl

My sleeping pattern has definitely changed as all those late work nights have built up over the month. And now all the fatigue from the stress and restlessness is hitting me. I've never been an easy sleeper, but this is getting a bit ridiculous. It doesn't help that I'm done school now and I have no set schedule and so I've been sleeping and waking up whenever I want to. My family has been quite generous and letting me relax a bit after finishing all my school stuff, but it's starting to get a bit embarrassing. My mom once sweetly said, "You know the saying, the early bird gets the worm? Just thought you'd like to know.." Haha.

for cheryl

I think it's about time I get back to Toronto time and get it altogether again! Sometimes, self-motivation seems to be the hardest thing, especially after a long journey already. I'm still terribly worried about my new career situation but I feel tired and unmotivated. :( BUT, life is not just about "feelings". It's about doing the right thing even if it's hard, sowing the seeds, and passing through the tunnel! I really should get out there and look hard! There's bound to be a window open somewhere! I'm sure there is a good place waiting for me... I just need to find it.

raspberry white chocolate truffle cupcake

Anyways, how self-indulgent of me. I've just been ranting on and on about myself without even telling you about the delicious baked goods you've been eyeing on this page so far. Am I right? Well you're in for a treat! Three treats, to be exact. These three goodies were for a very special picnic for a very special girl: Cheryl! It was my favorite Cheryl's 22nd birthday picnic, ever so sweetly organized by her boyfriend. It was a fantastic picnic with gourmet sandwiches, delicious antipasti, champagne and - you bet - cupcakes. I always like to bring baked goodies as gifts for my friends' birthdays, so this time it was no different. Just times three.

for cheryl

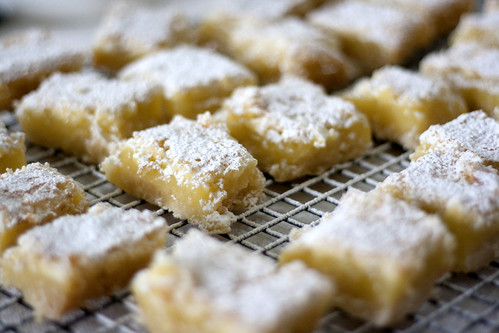
Her boyfriend requested some goodies along with birthday cupcakes for a group of ten or so. I decided that super sweet and sour lemon squares, and a fun and colourful m&m cookie would be perfect for a summery picnic! I also considered blueberry crumb bars as well, but it was just too much to make. Anyways, I'm so excited to introduce you to my new favorite recipe for lemon squares, which were much much much better than my last try. I really loved them because they were super lemony - but beware, the sugar level is crazy in this one. Only people with a true sweet tooth will appreciate this square. It was received very well among many, but my daddy did not approve. Next was my m&m cookie which just needed a terrific cookie dough recipe. I used allrecipe's Best Big Fat Chewy Chocolate Chip Cookie. It wasn't exactly the chewiest, but it was still great with the crunchy candied chocolates. By the way, I looove how it looks on the back of the cookie. The candies look like they were drawn on by colourful chalk! It's so cute!

for cheryl

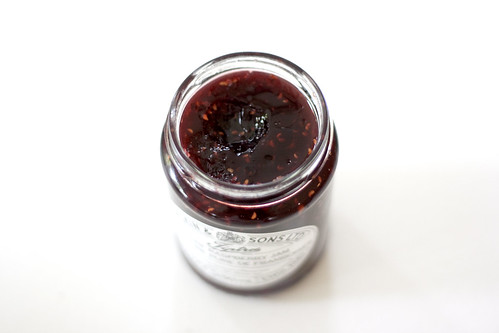
Lastly, my white chocolate cream cheese frosting on raspberry dark chocolate cupcakes. Well, see, I once tried this most fantastic cake which consisted of a moist deep chocolate cake, raspberry jam, a terrific white chocolate buttercream, and lots of white chocolate shavings on top. This was one memorable cake. I've always dreamed of recreating that with my cupcakes and this was my chance. I really had to investigate different ways I could make this cupcake because there are so many possibilities! I considered putting the raspberry jam right into the buttercream, or making a raspberry mousse to swirl with the buttercream, or to fill the cupcakes with raspberry jam... and it goes on. In the end, I sorta just settled on a easier and simpler method. I simply spread the rapsberry jam (which was DELICIOUS, and should be, because I spent lots of money on it) on top of the cupcake, and then I iced the buttercream on top. It turned out great... until I had to leave it in the hot car for a few hours. O DEAR O DEAR. Bad idea. It was a smoltering day and I should've known!! But baking till 1am did not do me too good so the next day I was a bit slow in realizing I should've kept it cold. The cupcakes were pretty gross looking by the time it was picnic time... but my friends didn't care. So sweet of them, they still ate it with much glee and praise. Thanks guys!!

for cheryl

Yummy M&M Cookies

adapted from allrecipes

makes 3 dozen


ingredients

2 cups all-purpose flour
1/2 teaspoon baking soda
1/2 teaspoon salt
3/4 cup unsalted butter, melted
1 cup packed brown sugar
1/2 cup white sugar
1 tablespoon vanilla extract
1 egg
1 egg yolk
2 cups mini or regular m&ms


directions

1.Preheat the oven to 325F. Grease cookie sheets or line with parchment paper.
2. Sift together the flour, baking soda and salt; set aside.
3. In a medium bowl, cream together the melted butter, brown sugar and white sugar until well blended. Beat in the vanilla, egg, and egg yolk until light and creamy. Mix in the sifted ingredients until just blended. Stir in the chocolate chips by hand using a wooden spoon. Drop cookie dough 1/4 cup at a time onto the prepared cookie sheets. Cookies should be about 3 inches apart.
4. Bake for 15 to 17 minutes in the preheated oven, or until the edges are lightly toasted. Cool on baking sheets for a few minutes before transferring to wire racks to cool completely.


for cheryl

Lemon Squares

makes 30 squares


ingredients

CRUST
1 1/2 cups all-purpose flour
1/2 cup confectioner's sugar
6 oz. cold unsalted butter, cut into 1/2-inch pieces

FILLING
6 large eggs
3 cups granulated sugar
1 cup plus 2 Tbsp. freshly squeezed lemon juice
1/2 cup all-purpose flour

GARNISH
about 3 tbsp of confectioner's sugar


directions

Crust: Preheat oven to 325 degrees. Combine flour and confectioner's sugar in the bowl of a stand mixer fitted with the paddle attachment, and beat on low speed until mixed. Add butter and continue to mix until the butter is the size of small peas, about 30 seconds. The mixture will be very dry. Gently press the mixture evenly onto the bottom of a 9-by-13-inch baking pan.

Bake until golden brown, 20 to 25 minutes. Let cool to room temperature. Reduce the oven temperature to 300 degrees.

Filling: In a large bowl, whisk together eggs and granulated sugar until smooth. Stir in lemon juice and then flour. Pour the filling on top of the crust.

Bake until the lemon filling is set, about 40 minutes. Let cool to room temperature and then put in the refrigerator for an hour or keep at room temperature for three hours before cutting. Cut into squares, about 2 1/4 inches. Dust tops with confectioner's sugar.

Note: The squares can be made a day in advance, covered and refrigerated. Bring to room temperature before serving. Dust with confectioner's sugar before serving.