milk&honey cafe

Showing posts with label nuts. Show all posts

Monday, January 23, 2012

Craving the Sun

Toasted Almond Dacquoise with Sweet Berry Cream

I love Winter. I love the snow and even the blizzards (it's exciting!). I love the sight of the snow-covered city and the sight of people bundled up head to toe. But if there's one thing I can't stand about winter time, it's that it gets pitch black by 5:00 pm. The shortened day killllls me. I hate walking home at 5:30 PM feeling like it's 10 PM. By the time I'm home and cooking dinner, there isn't even a trace of the sun. This also greatly effects my window of opportunity for food photography, as I greatly dislike taking photos in the evening with tungsten light.

View from my kitchen

Being able to bask in (and take food photos in) sunlight is a rare opportunity and this luckily, this Saturday was a beautiful one with plenty of sunshine. So when I woke up, I started the day with a mission. I promised I'd spend my day to make something really delicious and take a gazillion photos of it. I flipped through cookbooks, bookmarks, various blogs and food sites to find the right recipe. I wanted something some-what time-consuming to take full benefit of my free Saturday and something refreshingly different than what I've made here before. And there I saw it: Toasted Almond Dacquoise.

Toasted Almond Dacquoise with Sweet Berry Cream

I've had this cake at a birthday celebration before, made from Dufflet Pastries and I was blown away. I loved the delightful texture of the chewy/crunchy meringue and the pleasantly un-sweet berry-licious whipped cream filling. I knew I wanted to make it when I took a bite out of it, so when I saw a recipe that alluded to this cake, I instantly knew it was the one! I also happened to have a jar full of almonds and a container of berries in my refrigerator. Perfect!

The dacquoise is delightful cake layer that is used in a lot of fancy cakes, but don't be fooled by it's harsh sounding name – it's so easy to make! I found this wonderful recipe from Zoe Bakes and I think she describes it perfectly! "It's a light meringue that has nuts folded into it and baked in a thin layer. The dacquoise is crisp and used to add a sweet, nuttiness to your cakes. I love the contrast of a dacquoise with a soft sponge cake and a fruit mousse in the summer or with layers of rich chocolate in cooler weather." Are you in love yet?

(And this time, I had a whole day to bake so I made it a good one. Here's a step-by-step photo post for you!)

Toasted Almond Daquoise with Sweet Berry Cream

This recipes calls for almond meal, and you're free to buy them that way, but you can also just make your own. I happened to have almonds at home, so I toasted them (to make them more fragrant and delicious) for just about 8 minutes or so in a preheated oven at 350F. When cool, I grounded them in a blender/chopper.

Toasted Almond Dacquoise with Sweet Berry Cream

Next step is to preheat the oven to 225F and prepare your baking tray. Prepare sheets of parchment paper by drawing circles that match the size of the cake you are going to bake. The original recipe was for a 9-inch cake and so she used a cake cardboard round, but I wanted to make cute single-serve desserts so I used a glass instead.
Toasted Almond Dacquoise with Sweet Berry Cream

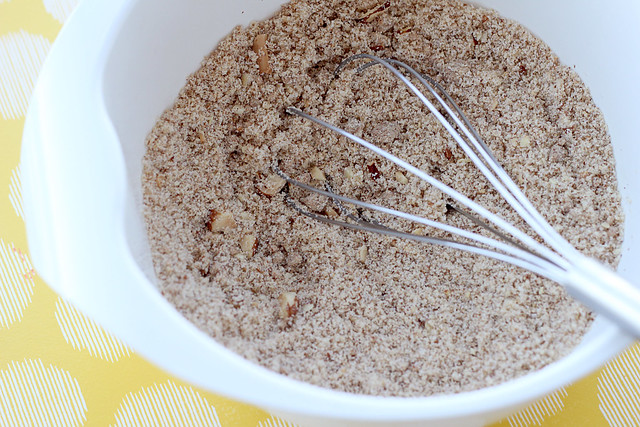
In a small bowl, mix the almond meal and 1/4 cup of sugar. Set aside. (I know you can see big chunks of almond here. I know it should be almond MEAL, but I actually liked having almond chunks in my cake before, so I kept a few in there.)
Toasted Almond Dacquoise with Sweet Berry Cream

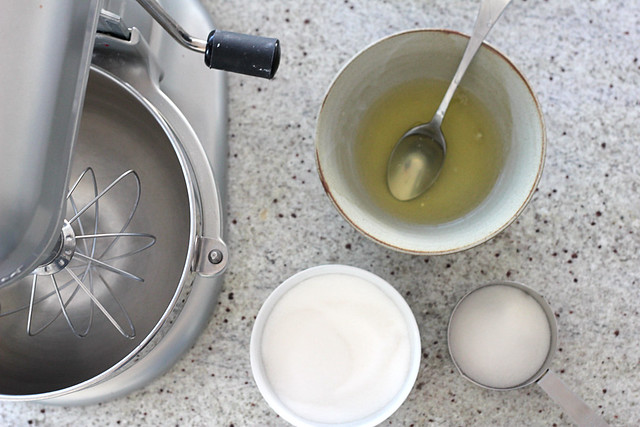
Now, it's time to whip the egg whites. A few tips here:
1. You probably need some sort of electronic mixer for this. I don't doubt you have the muscle-strength to whip eggs into its voluptuous state, but it's just really really hard work. It doesn't have to be stand mixer, though. I hand-held mixer is perfect.
2. Make sure your bowl is completely clean. Any traces of yolk, fat or soap, and these babies won't rise.
3. Have all the ingredients set out and ready. You want a steady and smooth transition when you're adding sugar and such, so it's great to have it all ready by your mixing bowl instead of letting the air die down while you prepare your next cups of sugar.

Beating Meringue

Whip the egg whites on low speed until they start to foam, about 45 seconds. Add the 2 tablespoons sugar to the whites and continue to whip on medium speed until soft peaks form. Once the whites form soft peaks slowly add the 2/3 cup sugar and continue whipping until stiff peaks are formed and the sugar, about 2 minutes.
Toasted Almond Dacquoise with Sweet Berry Cream

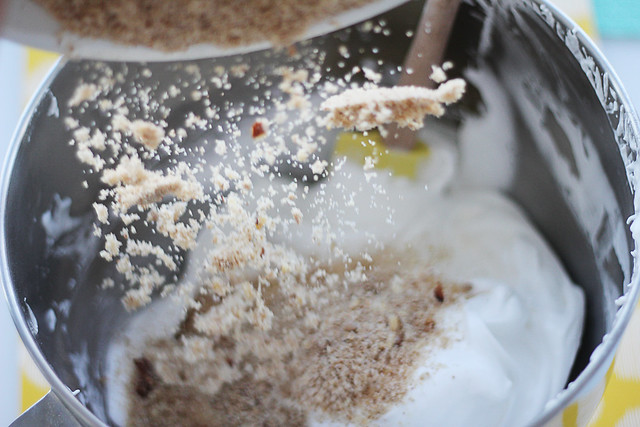
Time to whip out your spatula. Add the almond meal in two batches, folding them in gently after each addition. Don't overbeat! Fold in only until the almond meal is well distributed. You know your proper "folding" technique, right? Cut down the middle, scoop around the edge, rotate the bowl and repeat!

Toasted Almond Dacquoise with Sweet Berry Cream

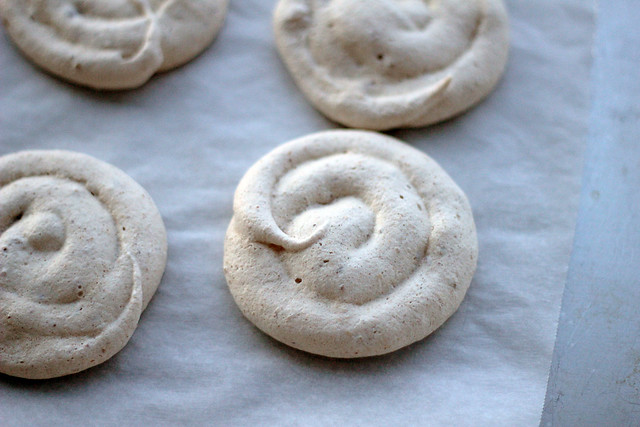
Now, you need a pastry bag fitted with a large round tip (or in my case, no tip at all – I couldn't find mine) and fill it with the dacquoise. The fun part: pipe spirals to fill the circles you've drawn on the parchment. It should be around 1/8" - 1/4" thick.
Toasted Almond Dacquoise with Sweet Berry Cream

The hard part: Bake the dacquoise at 225° until dry, about 65-85 minutes. (My little circles took around 70 minutes.) Why is it hard? That hour and a bit feels like forever when you're smelling the delicious almond meringue cooking in the oven! You can use this almond dacquoise recipe in a whole lot of delicious little desserts. I hope to try different cakes with this recipe! Oh, and did I tell you that this treat is gluten-free? This meringue-based cake is a great alternative to flour cakes!!
Toasted Almond Dacquoise with Sweet Berry Cream

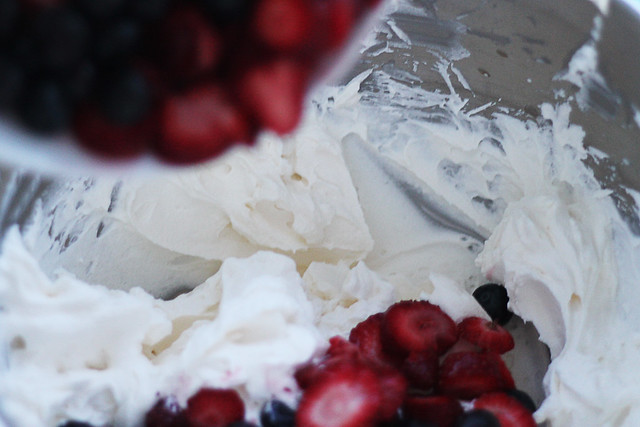
When your dacquoise layer is baked, let it cool on a rack. It's time to make delicious whipped cream with berries! Make sure your heavy cream is cold and straight out of the fridge. You're just going to whip the cream with a dash of pure vanilla extract and when it starts to hold shape, add about 3 tablespoons of powdered sugar (add and subtract depending on how sweet you want it). I like mine whipped to its hardest peak, just try not to curdle it! Fold in your berries and voila – your delicious berry whipped cream.
Toasted Almond Dacquoise with Sweet Berry Cream

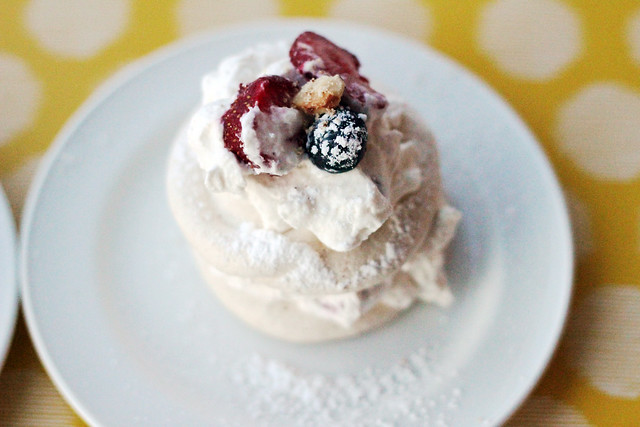
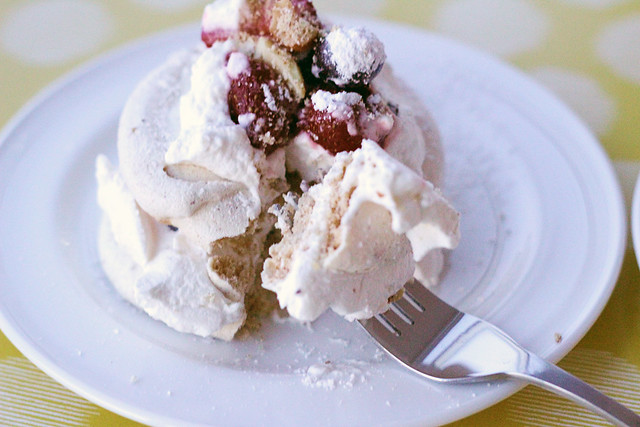
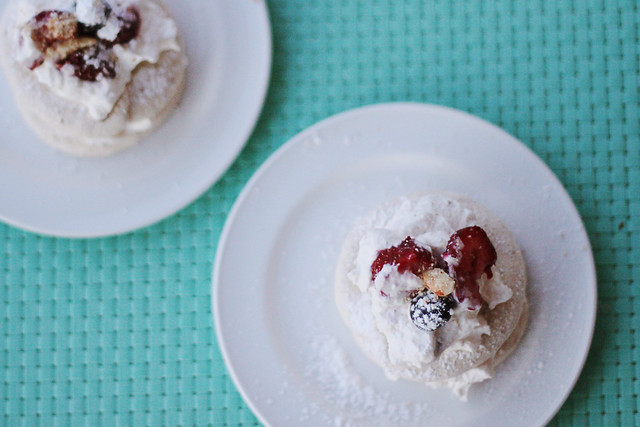
For my little treat cakes, I sandwiched two pieces of dacquoise between the cream, with more cream and berries on top. I even sprinkled some almond meal and dusted it with powdered sugar for extra prettiness. :)
Toasted Almond Dacquoise with Sweet Berry Cream

So there it is! A very delicious delicious dessert that I know you'll love as much as we did at home. After one bite, Andrew asked me, "Do you have any more? I think this is the best thing I've had in a loong time!" It was soo delicious!

And yes yes - this is more of a summer treat, what, with the berries and whipped cream and all. It's not quite fitting with the winter season, but think of it this way: how brilliant is it when you can create a bit of sunshine in your own kitchen? Cheers!
Toasted Almond Dacquoise with Sweet Berry Cream

Toasted Almond Dacquoise with Berry Whipped Cream
makes 9 little cakes or one 9" cake
recipe adapted from Zoe Bakes

ingredients
2/3 cups almond meal (1/3 cup whole almonds, finely ground)
1/4 cup sugar
2/3 cups egg whites (about 5 large)
2/3 cups + 2 tablespoons sugar (separate)

2 1/2 cups heavy cream, cold
1 teaspoon pure vanilla extract
3 tablespoon powdered sugar
2 cups fresh berries (you can also use frozen fruit)

directions
1. Toast whole almonds in a preheated oven at 350°F for 8 minutes. Grind them finely in a food processor or blender/chopper
2. Prepare parchment paper by drawing circles that match the size of the cake you are going to bake. In my case I used a small glass. Preheat the oven to 225°.
3. In a small bowl, mix the almond meal and 1/4 cup sugar and set aside.
4. Whip the egg whites on low speed in a mixer until they start to foam, about 45 seconds. Add the 2 tablespoons sugar to the whites and continue to whip on medium speed until soft peaks form. Once the whites form soft peaks slowly add the 2/3 cup sugar and continue whipping until stiff peaks are formed and the sugar, about 2 minutes.
5. Add the almond meal in two batches, folding them in gently after each addition. Make sure you only fold until almond meal is well-distributed.
6. Place the dacquoise in to a pastry bag fitted with a large round tip. Pipe in a large spiral until you have filled in the circles drawn on the parchment. it should be about an 1/8″ thick.
7. Bake the dacquoise at 225° until dry, about 65-85 minutes. Place on rack to cool.

For the cream:
1. In a mixer with a whisk attachment, whip heavy cream with vanilla extract until it starts to hold shape. Pour powdered sugar and add more to taste.
2. Add berries and fold until well-incorporated.

Assemble with prepared dacquoise, adding pretty details like powdered sugar and almond bits.

Saturday, November 21, 2009

Late Night Gratification

peanut butter cup

Friday nights are my late nights. They are the nights where while all my loved ones are fast asleep, I am up in my cozy room with a cozy light, determined to stay awake. They are really the only nights that I can stay up late since I get to sleep in late tomorrow. No matter how long my day, how much my bed calls for me, I am committed to this special night that only comes once every week. From pointless perusing on the world wide web, to finally uploading the pics from my camera; from catching up on fashion news to checking out my friends' status' on Facebook, Friday nights are precious "ME" time that I so dearly hold on to — no matter how heavy my eyelids are (which are closing as we speak right now).

peanut butter cup

So what do I have to offer tonight? Why, of course, a cupcake! ...who is just as indulgent as my late night enterprises! A rich chocolate cake crowned with a creamy deep peanut butter frosting, showered with some dark chocolate shavin' lovin', this cupcake is anything but a sleeper. Peanutbutter-love is an acquired taste to some, but I'm sure any one will love to take a bite out of these after smelling the rich peanut-y goodness. Well, whatever your "Friday Late Night" or "Peanut Butter Cupcake" is, do one good thing for yourself every now and then. Everyone is entitled to it!! Happy baking, everyone! :)

"Peanut Butter Cup"-Cake

recipe from Hershey's Kitchens and Food Network
makes 2 1/2 dozen cupcakes


ingredients

chocolate cake
2 cups sugar
1-3/4 cups all-purpose flour
3/4 cup unsweetened Cocoa
2 teaspoons baking soda
1 teaspoon baking powder
1 teaspoon salt
2 eggs
1 cup buttermilk or sour milk (add 1 tbsp of white vinegar to milk to equal 1 cup)
1 cup strong black coffee OR 2 teaspoons powdered instant coffee plus 1 cup boiling water
1/2 cup vegetable oil
1 teaspoon vanilla extract

frosting
2 cup confectioners' sugar
2 cup creamy peanut butter (I used organic)
10 tablespoons unsalted butter, at room temperature
1 1/2 teaspoon pure vanilla extract
1/2 teaspoon kosher salt
2/3 cup heavy cream


directions

1. Preheat oven to 350°F. Line pans with cupcake paper.
2. Stir together sugar, flour, cocoa, baking soda, baking powder and salt in large bowl. Add eggs, buttermilk, coffee, oil and vanilla; beat on medium speed of mixer 2 minutes (batter will be thin). Pour batter evenly into prepared pans.
3. Bake 18 to 25 minutes or until wooden pick inserted in center comes out clean. Cool 10 minutes; remove from pans to wire racks. Cool completely.
4. Place the confectioners' sugar, peanut butter, butter, vanilla, and salt in the bowl of an electric mixer fitted with a paddle attachment. Mix on medium-low speed until creamy, scraping down the bowl with a rubber spatula as you work. Add the cream and beat on high speed until the mixture is light and smooth. Frost as desired.


peanut butter cup

Sunday, April 19, 2009

Much Needed Vacation

blue chip chocolate chip cookies

A vacation is something I would very much like right now. But then again, despite the workload, I guess I have been having somewhat of a holiday lately. You see, I've sorta been in Lala-land for the past few weeks. The end of stressful studio courses and this sudden urge to play all day can be blamed, but a lot of it also has to do with the addition of the boyfriend. HEEHEE. Seeing each other at every chance we get totally feels like a vacay, ya know? We're totally in that fantastical stage where everything is rainbows and butterflies and people always catch us looking at each other with kissy eyes. SO gross - I know - but SO good.

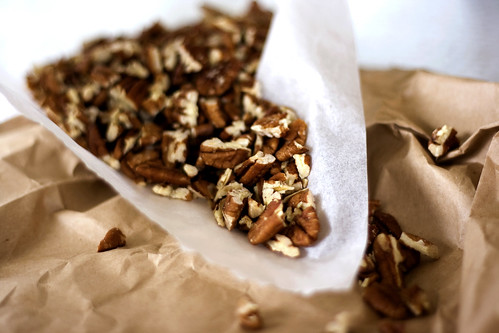
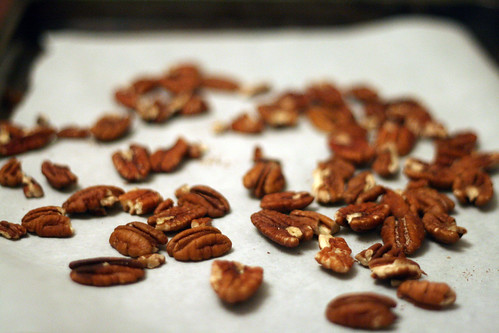
toasted pecans
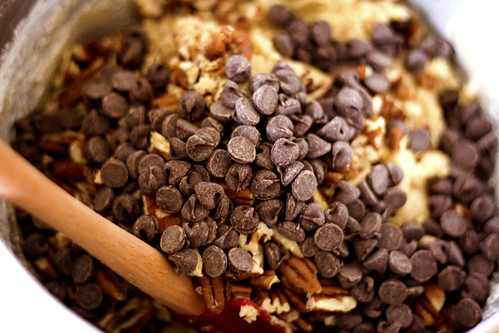
blue chip chocolate chip cookies

But this entry isn't really about him. It's about a vacation, a break, a hiatus: of the blog. I know I haven't been posting much lately anyway, but I realized that I really need to do this. I'm going to take a formal baking break and focus on what needs to be focused right now. I even told my boyfriend today that I wouldn't be able to see him too often for a while and I'm so very thankful how supportive he is. I know I've been complaining a lot about the stress and the workload, but I'm going to really zip the complaining and walk the talk. So here I am, doing a mini break-up with my other "boyfriend" too: my sweet milk and honey.. :(

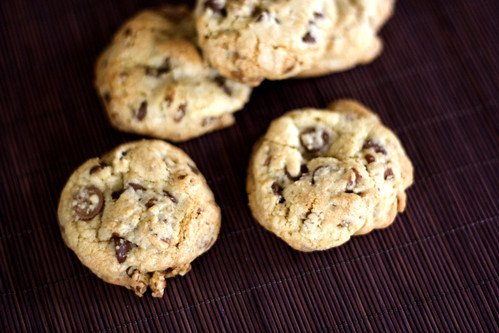
blue chip chocolate chip cookies

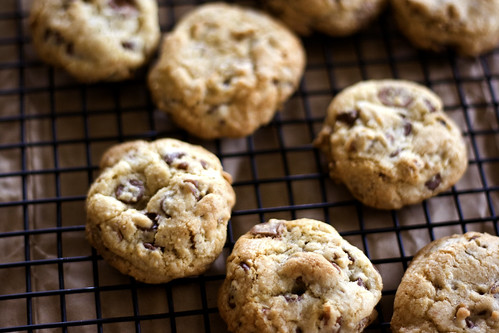
I won't leave you empty handed though! Although I am pretty sure you've seen this recipe on the other blog queens' blogs (SK, 101 cookbooks) I would like to give you David Lebovitz's famous Great Chocolate Chip cookie as well. I'm pretty sure I've posted this recipe before but I can't find it (teehee), so here it is again! It's a great, classic cookie with a killer chocolate/nut to dough ratio. The texture, flavor, and bite is perfect. It's an essential chocolate chip cookie that can do no wrong, so make sure you keep this on file! :)

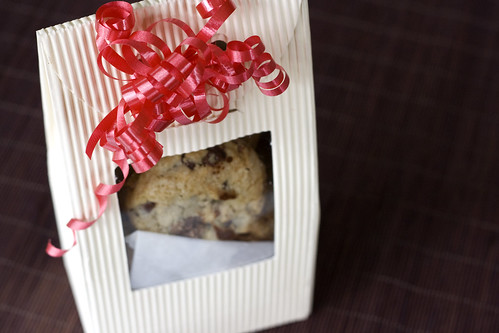
blue chip chocolate chip cookies

Alllrighty... so I'm probably going to totally go into major blog withdrawal, but I must do what I must do. It's not just the blog either. It's everything in my life right now. Gotta prioritize, make sacrifices and focus myself!! Sigh. Don't get me wrong though. It's very exciting too. Challenges are always a hurdle and an opportunity at the same time, so I'm really looking forward to getting through all this! Here I come, graduation/employment/sister's wedding! And with a brave cookie in hand, of course!

Great Chocolate Chip Cookies

recipe from The Great Book of Chocolate
makes about 20 cookies


ingredients

1/2 cup (100 grams) granulated sugar
1/2 cup (120 grams) firmly packed light brown sugar
8 tablespoons (1 stick) (115 grams) unsalted butter, cold, cut into 1/2-inch (1cm) pieces
1 large egg
1 teaspoon vanilla extract
1/2 teaspoon baking soda
1 1/4 cups (175 grams) all-purpose flour
1/4 teaspoon salt
1 1/2 cups (200 grams) semisweet chocolate chips
1 cup(130 grams) walnuts or pecans, toasted and chopped


directions

1. Adjust the oven rack to the top 1/3 of the oven and preheat to 300F (150C). Line three baking sheets with parchment paper.
2. Beat the sugars and butters together until smooth. Mix in the egg, vanilla, and baking soda. Stir together the flour and salt, then mix them into the batter. Mix in the chocolate chips and nuts.
3. Scoop the cookie dough into 2-tablespoon (5cm) balls. Bake for 18 minutes, or until pale golden brown. Remove from the oven and cool on a wire rack.
5. Store at room temperature in an airtight container for up to 3 days.


great chocolate chip cookie

Monday, March 30, 2009

Stress is the new black

white chocolate macadmia cookies

Is it just me or is everyone just totally stressed out lately? I might be just staring at the big elephant in the room, aka the economic depression, but I think it's a little more than that. Or is it just that? I guess the poor economy makes everyone stressed out. Myself--graduating in a couple months--for one. Everyone tells me that I'm graduating at the worst time: trying to jump start a career while there are tens of thousands of people getting laid off. Eeek!

white chocolate macadmia cookies

I'm really feeling the pressure of having to find a job soon, let alone just trying to get all my school projects done in time. My parents are amazingly supportive and wonderful to me, yet I still feel the pressure of getting the first steps of my career right constantly from them. Sighhh. I have surging desires to move out and be independent too, but how could I if I can't afford it!

white chocolate macadmia cookies

But I'm not alone. Most definitely not. It's all around me. My fellow graduating class, all of the fellow new young professionals, not so new and young professionals, not necessarily professional workers, and... pretty much everyone trying keep their chin up during this hard time. And so maybe this is the perfect time to just reach out and get through the dark together! Everything will eventually get better, that's for sure, because there's a season for everything. So wouldn't it be great if we got out of this with a little more peace in ourselves, and with each other? Wouldn't it be awesome if we actually got something good out of this in the end?

I loove this song: Everything is everything by Lauryn Hill. (It's on my music player to your left!)

Now, everything is everything
What is meant to be, will be
After winter, must come spring
Change, it comes eventually

Sometimes it seems
We'll touch that dream
But things come slow or not at all
And the ones on top, won't make it stop
So convinced that they might fall
Let's love ourselves then we can't fail
To make a better situation
Tomorrow, our seeds will grow
All we need is dedication


white chocolate macadmia cookies

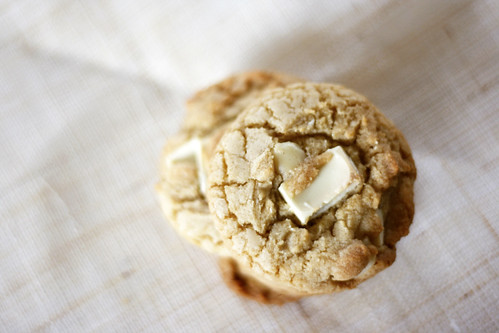
Okay, that's enough rambling on my part. What brought me to talk about this in the first place? Oh right. These cookies. Hehe. I baked these cookies for my boyfriend who had two exams yesterday and he seemed pretty stressed out with everything too. So in order to cheer him up and give him a sugar boost, I baked some cookies and brought them to him. And yes! It worked! (Right Andrew?) There's always a way to make life a little brighter and sweeter, and cookies are definitely one.

white chocolate macadmia cookies

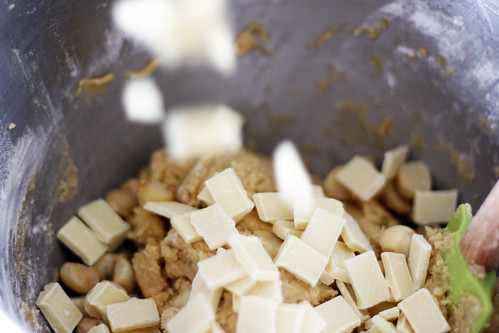
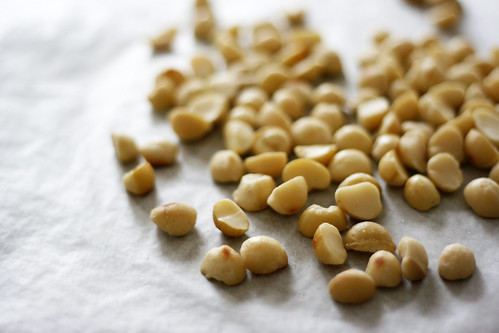
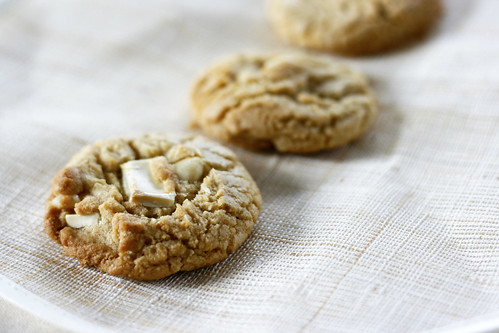
I had some great macadamia nuts I got as a gift and I realized I had white chocolate left in my pantry so I searched for a good recipe. Ugh.. it's always hard finding a good recipe isn't it? I guess I sorta judge the recipe on the photo a lot, but that's not always a good idea. Anyway, after a few hours of browsing through the web, I decided to pick this one because it seemed simple enough and sounded about right for a soft and chewy cookie. The verdict? Almost there. It was much more dense that I thought it would be, but it was surprisingly chewy. Kinna on the hard side, but still softish when you chew into it. I would probably look for another recipe next time, but please try it for yourself and see if you like it!! :)

White Chocolate and Macadamia Nut Cookies

about 3 dozen


ingredients

2 c. plus 2 tbsp all-purpose flour
1/2 tsp baking soda
1/2 tsp salt
12 tbsp (1 1/2 sticks) unsalted butter, melted & cooled until warm
1 c. brown sugar, packed
1/2 c. granulated sugar
1 large egg plus 1 yolk
2 tsp vanilla extract
1 c. white chocolate chips
3/4 c. macadamia nuts, toasted and halved


directions

1. Preheat oven to 325F. Adjust oven racks to upper & lower-middle positions. Line cookie sheets with parchment paper.
2. Whisk dry ingredients together; set aside.
3. With electric mixer, or by hand, mix butter & sugars until thoroughly combined. Beat in egg, yolk and vanilla until combined.
4. Add dry ingredients slowly and beat at low speed just until combined. Stir in chips and nuts.
5. Drop cookies by 1 tablespoons (or mini ice cream scoop) onto baking sheets.
6. Bake, reversing position of cookie sheets halfway through baking, until cookies are light golden brown and outer edges start to harden yet centers are still soft & puffy, 12-15 minutes depending on size. Cool cookies on sheets until able to lift without breaking and place on wire rack to cool.


white chocolate macadmia cookies

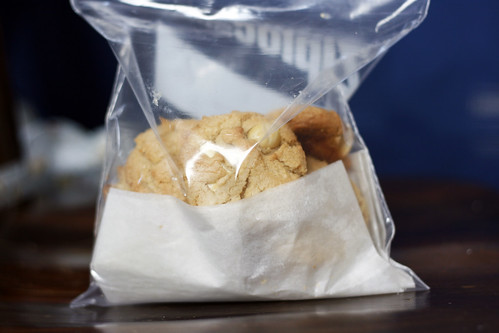
A ghetto ziplock bag of cookies for the boyfriend. Hehe. He ate like 8 in one setting! :P

Saturday, December 20, 2008

Christmas Bake-a-thon: Pecan Bars

pecan bars

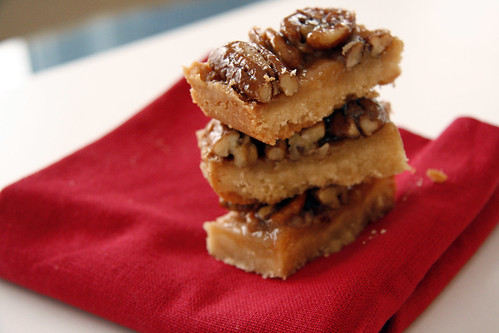
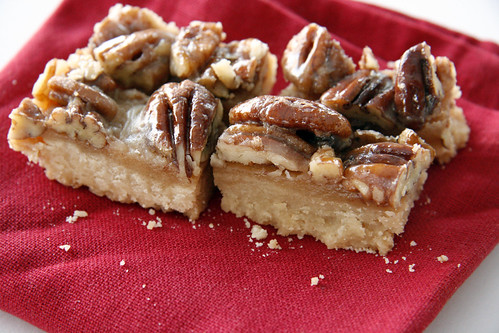
Pecan bars are deadly...yet fabulous! I don't mean to scare you right off the bat, but the amount of butter and sugar and butter that goes into it? Yikes! You have to blame a lot of it on the pecans too, though. Pecans themselves are buttery calorific delights. But what can I say? They are just too darn delicious.

pecan bars

Now that I have cleared that out of the way, I found this version from Martha Stewart's Cookies. This recipe was created by John Barricelli (Martha's baking man that occassionally shows up on her show too) and I think they were a great choice for this baking occasion. My church asked for some baked goodies for the Christmas get-together thing and after a pretty traditional lunch (turkey and cranberries and ham) I thought nothing better than to finish it off with pecan pie...bars!

pecan bars

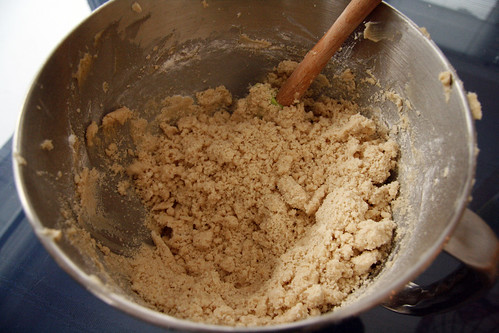
Make sure you keep your shortbread dough crumbly and not overbeaten, so that it would give a nice crumbly and soft texture.

pecan bars
pecan bars
pecan bars

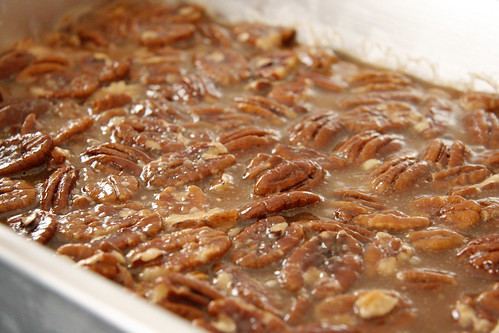
I think I might have done something wrong or different than what was supposed to be done for the pecan filling part. In the picture of the book, the pecan filling is very glossy and full, but mine became quite dull after a day and less caramel-y looking. And.. the recipe call for a 9x13" pan, but it seemed that there was not enough filling. The pecans were quite bare for some of the parts. I'm not sure but maybe if I make it again, I might increase ever so slightly the filling amount (while keeping the pecans the same).

pecan bars

But the flavor was definitely all there. It was nutty and buttery and caramel-y and delicious! Mmm! And they smelled great!! People really liked these babies. (I saw one lady take about 5 pieces) Haha! Definitely will make this again.

pecan bars

Pecan Bars

Makes about 4 dozen pieces
from Martha Stewart's Cookies


ingredients

for the crust:
1 cup plus 2 tbsp (2 1/4 stick) unsalted butter, room temp
3/4 cup packed light brown sugar
1/2 tsp salt
3 cups AP flour

filling:
1/2 cup (1 stick) unsalted butter
1/4 cup packed light brown sugar
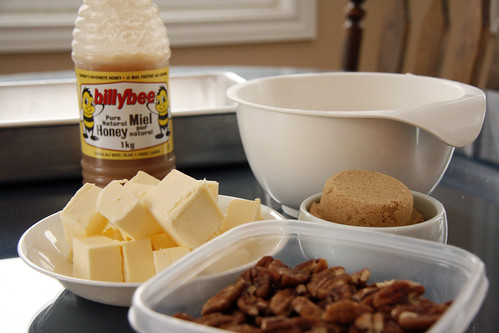
1/4 cup plus 2 tbsp honey
2 tbsp granulated sugar
2 tbsp heavy cream
1/4 tsp salt
2 cup (8 oz) pecan halves
1/2 tsp pure vanilla extract


directions

1. Preheat oven to 375F. Make crust: Put butter and brown sugar into a bowl on an electric mixer fitted with the paddle attachment; mix on med speed until light and flufy. about 2 minutes. Mix in salt. Add flour, 1 cup at a time, mixing until fully incorporated after each addition. Continue mixing until dough to come together in large clumps.

2. Press dough about 1/4" thick into a 9 x 13" baking pan. Pierce the dough with a fork. Chill until firm, about 20 minutes. Bake until golden brown, 18-20 minutes. Transfer to a wire rack to cool completely. Reduce oven to 325F.

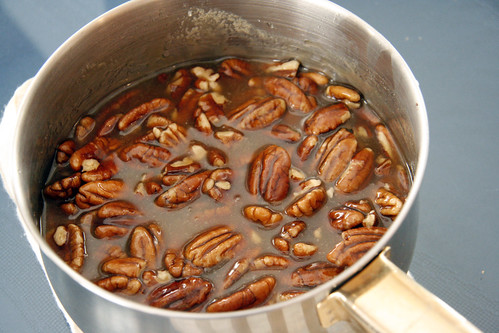
3. Make filling: Place butter, brown sugar, honey, granulated sugar, and heavy cream in a sauce pan over high heat. Bring to a boil, stirring constantly until mixture coats the back of a spoon, about 1 minute. Remove pan from heat; stir in salt, nuts, and vanilla. Pour filling into the cooled crust.

4. Bake until filling bubbles, 15 to 20 minutes. Carefuly transfer to a wire rack to cool completely. Run a paring knife around edges of the pan and invert onto cooling rack. Invert again onto a cutting board. Use a sharp knife to cut into 1 by 3 " bars. Bars can be stored in an airtight container at room temp up to 1 week.


pecan bars

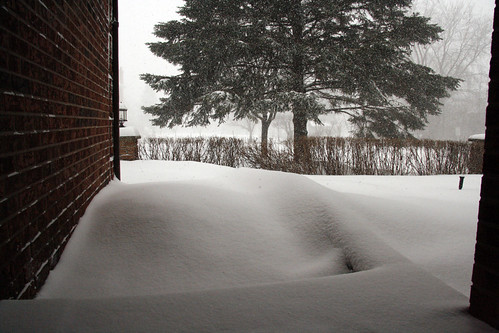
Okay and a random last picture. This is the view outside my door. Us Torontonians got a severe snow fall alert (which is why I stayed in all day, baking!). And boy did it snow out there. It piled up quite a bit. I mean, you can't help but admire the white fluffy sparkly stuff outside, but dear-oh, shoveling? Shoveling makes it not worth it no more. :( No more!

Monday, November 24, 2008

Blondies have more fun

blondies

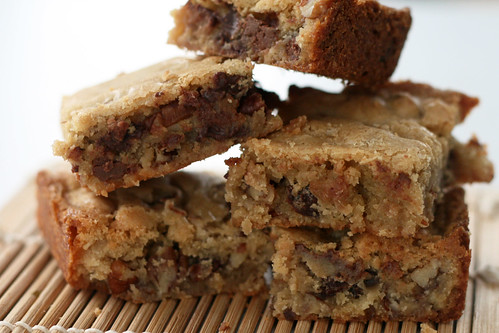
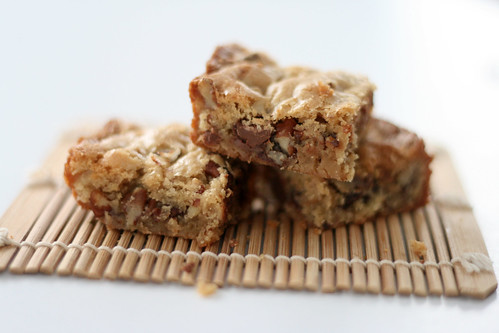
Do blondes have more fun? It's one of those questions that people like to talk about, but I wouldn't know. Cuz I'm a very black-haired girl. And proud! Hehe. But nonetheless, "blondies" - in their buttery, chewy and delicious sense- are perfectly fun.

blondies

Last night, my lovely family of three (Jenn & Kev) were craving some sweets again after dinner so I busted out my spatula once again. I looked online for an easy breezy recipe I could just make out of the stuff I have in my pantry and found a perfect recipe on smitten kitchen. (I lovvee that blog, by the way!) And honest to goodness, it is the easiest thing I have ever baked in my life.

blondies

It took not even 15 minutes to prepare, and almost one bowl!! The result was delicious and delightful and hit the spot right away. It's chewy and soft and wonderful.

Blondies

16 medium squares
from Smitten Kitchen


ingredients

8 tablespoons butter, melted
1 cup brown sugar
1 egg
1 teaspoon vanilla or 1/2 teaspoon almond extract
Pinch salt
1 cup all-purpose flour


directions

1. Preheat oven at 350°F. Butter an 8×8 pan.
2. Mix melted butter with brown sugar - beat until smooth. Beat in egg and then vanilla.
3. Add salt, stir in flour. Mix in any additions (below).
4. Pour into prepared pan. Bake for 20-25 minutes, or until set in the middle. It might seem a little underbaked at first, but when you leave it to cool on the rack for a while, it'll set.


Further additions, use one or a combination of:


1/2 to 1 cup chopped nuts, toasting them first for even better flavor
1/2 to 1 cup chocolate chips
1/2 teaspoon mint extract in addition to or in place of the vanilla
1/2 cup mashed bananas
1/4 cup bourbon, scotch or other whiskey; increase the flour by one tablespoon
2 tablespoons of espresso powder with the vanilla
Stir 1/2 cup dried fruit, especially dried cherries, into the prepared batter
Top with a vanilla butter cream or chocolate peanut butter cream frosting