milk&honey cafe

Showing posts with label parties. Show all posts

Sunday, August 23, 2009

Merci Danke Arigato

for a birthday party

Hello wonderful friends! Hmm today is one of those days where I just can't think of something to write about. Other than the fact that I made some deliciously summery cupcakes for a friend's birthday party, I'm drawing a blank here. But there is one thing I wanted to say... THANK YOU!! I know all those celebrity food bloggers get 19280 comments every post, but I'm squealing with joy whenever I get one comment -- it means you guys like me and that's like a super duper feeling.

for a birthday party

I know I've been sorta neglecting my blog lately just being busy n all, but I'm so excited to see that people are still wooed by my baked goodies. And I don't deserve it! :P So I just wanted to give y'all a BIG WARM THANKS and I'm going to try my best to make this an even better blog. Merci danke arigato!

for a birthday party

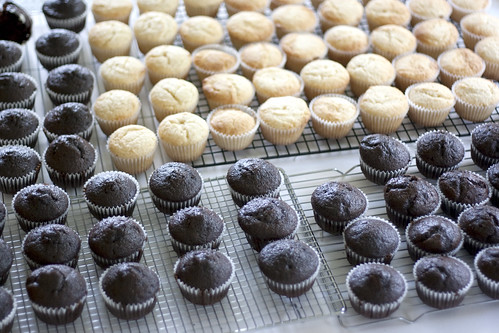
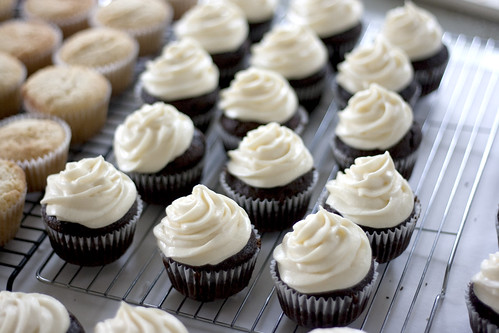
By the way, I made these new key lime cupcakes and they were really really good. My friend only asked for two things: a summery pair of flavors and green + blue for decoration. She trusted me with the rest of the decision making. And that's all I really needed cuz I got so inspired with that request!! Hahah. As silly as it sounds, the first thing that popped up in my head was the brilliantly coloured sprinkles they sell at bulk barn and from that I decided to go with dark chocolate cake and white billowy frosting, along with a fresh lime cupcake.

for a birthday party

Of course I used my black magic cake for the chocolate cake. And I used an impromptu cream cheese frosting (I originally was going to make simple vanilla buttercream) that I got to halve from the lime cream cheese frosting. The key lime cupcakes weren't actually key lime since I couldn't get my hands on some real Florida key limes but the Mexican limes did the job. I found the recipe from bon appetite. It's a delightful recipe for a delightful cupcake. The limes are definitely a different taste from lemons but equally lovely. Are you a lime-lover? You should give it a try!!

Key Lime Cupcakes

recipe from bon appetite
makes 12 cupcakes


ingredients

CUPCAKES

1 cup all purpose flour
3/4 cup self-rising flour
1/2 cup (1 stick) unsalted butter, room temperature
1 1/4 cup sugar
2 large eggs
2 1/2 tablespoons fresh lime juice
1 tablespoon finely grated lime peel
1/4 teaspoon neon-green food coloring (optional)
3/4 cup buttermilk

FROSTING

1 8-ounce package cream cheese, room temperature
1 1/2 cups powdered sugar
1/2 cup (1 stick) unsalted butter, room temperature
1 tablespoon finely grated lime peel
1/8 teaspoon neon-green food coloring (optional)
1/2 teaspoon vanilla extract


directions

1. Preheat oven to 350°F. Line standard muffin pan with 12 paper liners. Whisk both flours in medium bowl. Beat butter in large bowl until smooth. Add sugar; beat to blend. Beat in eggs 1 at a time, then next 3 ingredients (batter may look curdled). Beat in flour mixture in 3 additions alternately with buttermilk in 2 additions. Fill pan cups 2/3.
2. Bake cupcakes until tester inserted into center comes out clean, 20 to 25 minutes. Cool 10 minutes. Remove from pan; cool.
3. For frosting: Beat all ingredients in medium bowl until smooth. Spread over cupcakes.


for a birthday party

Friday, July 10, 2009

Short Order

chocoholic

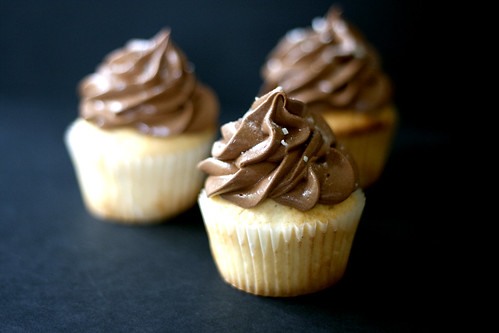
Not exactly short order, these cupcakes were done on short notice! For a special birthday party of a one month old baby. How cute is that. These cupcakes turned out more grown-up looking than a baby party, but I figured it'd be mostly adults attending the party, no? Ah.. Maybe not. The decoration was up to me, so I just stuck with what I thought was pretty. I am a gourmet cupcake maker, after all. Ya right!

chocoholic

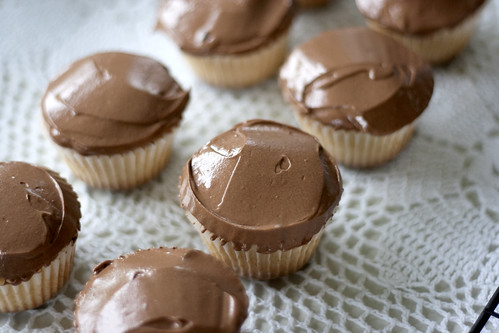
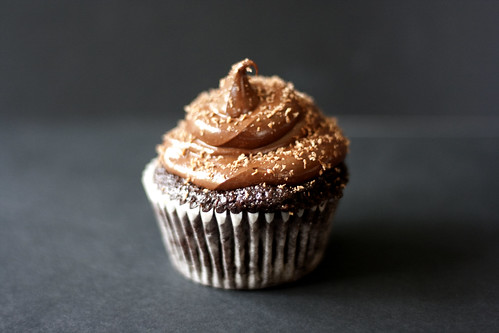
The first cupcake you see here is the Chocoholic. It's a dark chocolate cake (my indispensable black magic cake) and dark chocolate frosting (martha stewart's recipe) with milk chocolate shavings. It's very very chocolatey. The second cupcake you see below is the van ♥ choc. A soft vanilla cake (Magnolia's) embracing a huge hunk of milk chocolate ganache frosting.

van ♥ choc
van ♥ choc

By the way, I made labels for my cupcake boxes!! I was thinking of doing this a whilllle back, but never got around to it. And as I was scrounging around my room for some sticky paper, I found translucent printable label stickers. How Perfect. They looks so groovy with the brown boxes. The photo doesn't do justice, though, you gotta see em in person how pretty they look. I'm so cool. Cmon now, give it to me! Heehee just playing around with you! :P

milk + honey cupcakes

Alrighty. This was a short one. Hope you enjoyed it! All the necessary recipes are linked up there, so please follow accordingly! :) Have a fantastic day, everyone! (Okay, I was going to end it here, but I took so many photos of my cupcakes, and I want to show them all! Hope you don't mind!)

milk + honey cupcakes
van ♥ choc
chocoholic
van ♥ choc

Tuesday, June 02, 2009

How Precious

how precious

There are some really talented people in this world. Let's take Sally Han for example. She is a Toronto-based jewelery designer and owner of Psalms 91:1 Accessories. I'm very proud to call her a friend of mine, because she's a small lady with big dreams! She's got awesome talent for beautiful accessories, with a sweet and grounded philosophy behind it. Her stuff is super modern, but vintage, and never ever tacky. We all know she's going to make it big -- she already is! Runway-ing it at the Toronto Fashion Week, having TV appearances, lots of celebrity love, and praise from magazines. Pretty cool huh?

how precious

So last weekend Psalms 91:1 had a special private event, and she actually ordered some cupcakes from me! It was a super cool kind of event, where she rented out a photo studio in the fashion district, displayed her beautiful accessories, had a photo shoot going on, and people sipped on wine. And my cupcakes were going to fit right in! Heehee.

how precious

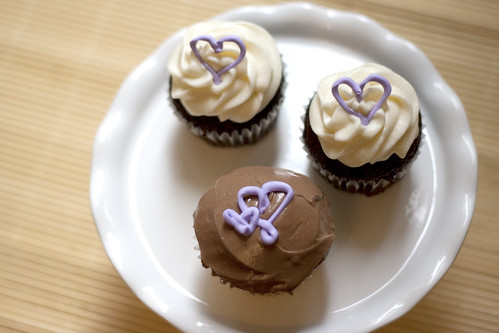
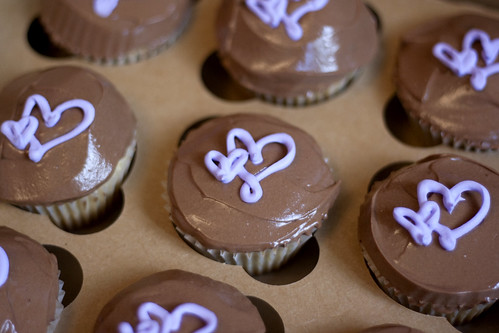
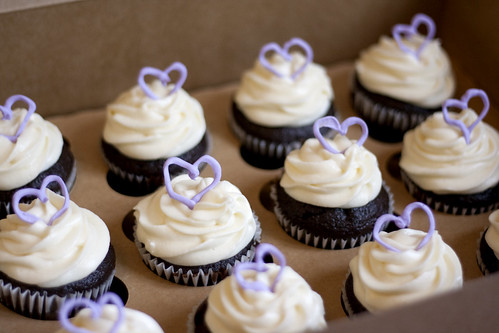
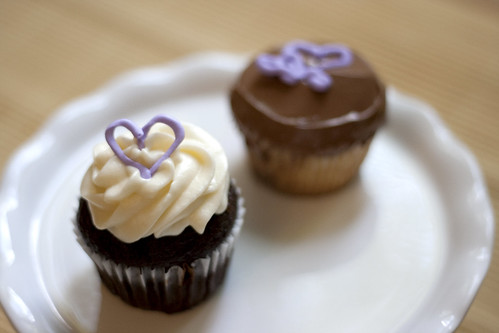
The theme was "How Precious" with purple hearts. She ordered two flavors: Van ♥ Choc (Vanilla cake with Chocolate ganache frosting) and Choc ♥ Van (chocolate cake with cream cheese frosting). And I made pretty little purple hearts with royal sugar icing.

how precious

I decided to take a chance and try two new recipes for the order. Sorta risky but I thought it was a good time to go for it. First one was a new vanilla cake recipe. I've been using Billy's Vanilla Vanilla for the longest time, and it was a trusty one I guess. It was an error-proof, easy, and pretty yummy recipe. But never really amazing. And I wanted something amazing. Something really moist and flavorful and fluffy. So as I was researching some recipes, and I encountered the Amy Sedaris one. I've seen her cookbook I Like You before, and I came across her recipe a few times on the net. There was a divided opinion on her recipe, so I thought I'd be in on this and try it myself. I thought to myself, what if... what if this one was the the end all and be all of vanilla cakes? What if the search was over?? Ahaha.... not so much.

how precious

Unfortunately, this recipe was a big big let down. But honestly, it could have been my fault, so please don't write off her recipe. You should give it a try to, and maybe you'll do a better job at it! In my case, the cake was dense, dry, and needed a big gulp of milk every time I bit into it in order to wash it down my dry throat. The flavor was great, however. There was real vanilla-y buttery goodness, without being overbearingly sweet. I really liked that. I just wish it had that soft fluffiness that we all cake lovers yearn for. I regretted using this recipe for the event, and pictured people being disappointed in the cake. I usedthis recipe for the the frosting, and it did not disappoint at all.

how precious

Okay. Let's talk about the good stuff now. The difference of the two recipes were truly black & white because the new chocolate cake was just awesomeness. Soooo moist, so soft, and soooooo chocolatey. It's Hershey's Black Magic Cake, and it really was both black and magical. I found this recipe on someone's blog a while back, and she was rambling on how this was the one recipe that made her turn into a chocolate lover and how great it was. I bookmarked it and couldn't wait till I got a chance to use it! Everything about the cake was the perfect chocolate cake. Plus it was a great partnership with the creamy and tangy vanilla cream cheese frosting.

how precious

I wish vanilla cakes could have the same texture as chocolate cakes. Maybe it's the buttermilk? Herm. Does anyone know a fabulous vanilla cake recipe? But like I said before, don't always take my word for the recipes I try. I don't mean to bad-mouth other people's recipes, you know? It's just my opinion so please try it for yourself and it might work out perfectly for you! Ah, I guess it just means that the search for the perfect vanilla cake is still on for me.. :D

Black Magic Cake

recipe from Hershey's Kitchens
makes 2 dozen cupcakes


ingredients

2 cups sugar
1-3/4 cups all-purpose flour
3/4 cup unsweetened Cocoa
2 teaspoons baking soda
1 teaspoon baking powder
1 teaspoon salt
2 eggs
1 cup buttermilk or sour milk*
1 cup strong black coffee OR 2 teaspoons powdered instant coffee plus 1 cup boiling water
1/2 cup vegetable oil
1 teaspoon vanilla extract


directions

1. Preheat oven to 350°F. Line pans with cupcake paper.
2. Stir together sugar, flour, cocoa, baking soda, baking powder and salt in large bowl. Add eggs, buttermilk, coffee, oil and vanilla; beat on medium speed of mixer 2 minutes (batter will be thin). Pour batter evenly into prepared pans.
3. Bake 30 to 35 minutes for round pans, 35 to 40 minutes for rectangular pan or until wooden pick inserted in center comes out clean. Cool 10 minutes; remove from pans to wire racks. Cool completely. Frost as desired. Yields 10 to 12 servings.
* To sour milk: Use 1 tablespoon white vinegar plus milk to equal 1 cup


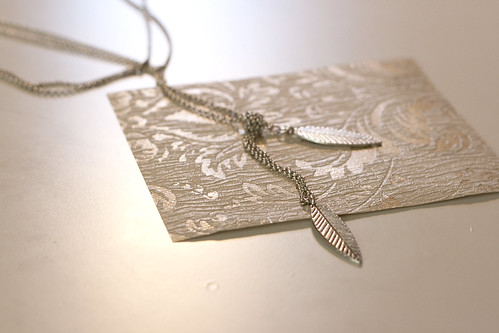
Oh, and Sally's BEAUTIFUL necklace that my boyfriend bought for me at the event! And the pair of earrings she gave me as a gift. :) I love them both!!

how precious
how precious

Monday, January 26, 2009

Strawberry Fields Forever

strawberry cupcakes

Let me take you down, 'cause I'm going to Strawberry Fields.
Nothing is real and nothing to get hung about.
Strawberry Fields forever. - The Beatles


strawberry cupcakes

Hmm.. unfortunately, I believe that most things are real and there are lots of things that we do get hung about, but today, I just wanted to say that despite all that, there is so much to celebrate! Like my friend Helen's birthday! Life might not be strawberry fields forever, but there definitely are sweet moments to delight in!

strawberry cupcakes

Happy birthday to Helen! She's so special to me because it's not about the outwardly appearance or words that make our relationship, but the heart-to-heart connection. We've gone through a lot over the years, and she's blessed my life in lots of ways. It wasn't the good times that brought us closer but the tears and hurts that let us open up. I think that kind of friendship is so precious and priceless.

strawberry cupcakes

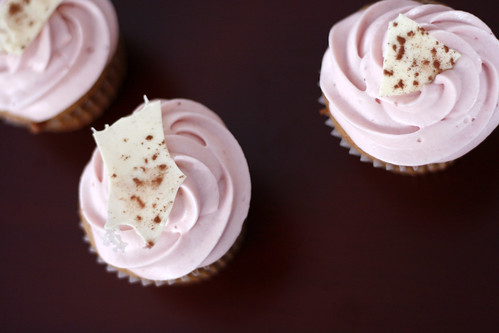
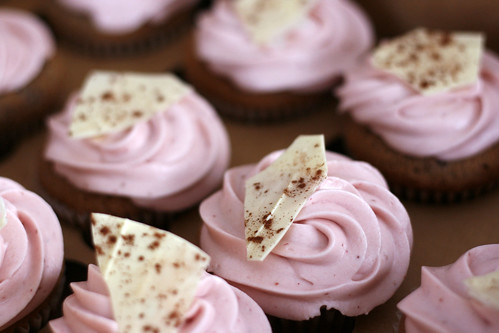
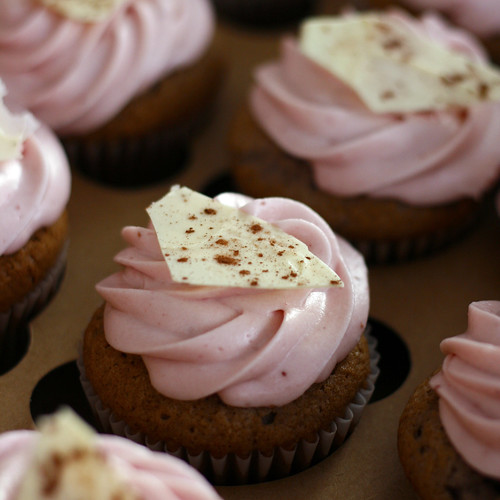
So in light of that, I've baked some cupcakes for her--I guess I've sorta made myself the designated baker for parties. She loves my strawberry cheesecake, but I hadn't had enough time to bake it, so I went with strawberry cupcakes. It was a compromise: it had strawberries and cream cheese in it! I found a FANTASTIC recipe from speedM on Flickr. The icing tasted literally like Strawberry Haagen Daaz ice cream, or Strawberry Pocky!
strawberry cupcakes

It was simple to make and just gorgeous! I'm actually a huge non-fan of strawberries. I don't like em at all. I love fruits but strawberries--blegh. But these cupcakes were great. I'm glad I tried this recipe! You should too! As for decoration, I didn't want to do a typical strawberry topping, so I did a modern looking chocolate piece. I just melted the white chocolate and spread it thin, dusted some cocoa powder on it, then froze it, then broke it into pieces. It was nice against the pale pink of the frosting.

Strawberry Cupcakes

makes one dozen


ingredients

STRAWBERRY SAUCE
2 cups of fresh strawberries, cut in half and stem removed
sugar to taste

CUPCAKES
1/2 cup (1 stick) unsalted butter, room temperature
1 cup sugar
2 large eggs, room temperature
1-1/3 cups all-purpose flour
1/2 teaspoon baking powder
1/2 teaspoon baking soda
1/8 teaspoon salt
1/2 cup strawberry sauce
1/4 cup milk

CREAM CHEESE FROSTING
8 ounces or 1 package of cream cheese
1/2 stick butter
4 cups sifted powdered sugar
approximately 1/4 cup of strawberry sauce


directions

STRAWBERRY SAUCE
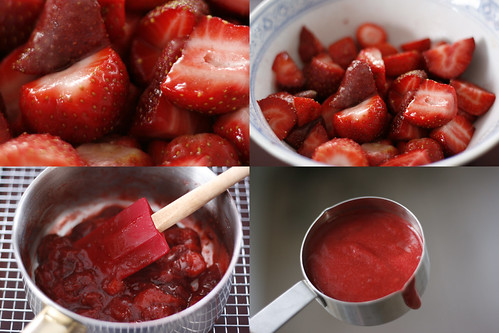
1. Soak strawberries with about 1-2 tbs sugar for 15 minutes. Put strawberries in a small saucepan and heat under medium heat with lid on. Cook strawberries for approximately 15 minutes till strawberries cook down and become soft and saucy. Adjust sweetness with sugar until you get the desired sweetness. With a blender, puree until you get the desired smoothness or chunkiness. Cool before using in recipe.

CUPCAKES
1. Preheat oven to 350F. Line cupcake pans with cupcake papers. Whisk flour with baking powder, baking soda and salt. Set aside. Measure out milk and strawberry sauce together. Set aside.
2. Beat butter on high until soft, about 30 seconds. Add sugar. Beat on medium-high until light and fluffy, about 3 minutes. Add eggs one at a time, beat for 30 seconds between each.
3. Add about a fourth of the flour to the butter/sugar mixture and beat to combine. Add about one third the milk/strawberry sauce mixture and beat until combined. Repeat above, alternating flour and milk and ending with the flour mixture. Scoop into cupcake papers about half to three-quarters full (depending on whether you want flat or domed cupcakes). Bake for 20-22 minutes, or until a cake tester comes out clean.

CREAM CHEESE FROSTING
Bring cheese and butter to room temperature by letting it sit out for 1 or 2 hours. Sift powdered sugar into a bowl. Beat butter and cheese at medium speed until creamy. Add half of the sugar, beat until combined. Add strawberry sauce until you achieve the right color and flavor, making sure not to add too much or the frosting will be too soft. Gradually add remaining sugar (more if you have to) until you get to the consistency and sweetness you like.


strawberry cupcakes

Monday, January 12, 2009

The Sunny and the Rainclouds

red velvet love

Tonight I really feel thankful for a lot of things. I should be thankful always, really, because there are so many things that I am blessed with. A joyful family who loves me just the way I am. Loving friends who are just where I left them when we finally meet again. Being part of a church with so much love and excitement to see one another grow! And even the everyday and not so everyday gifts I have in life.

red velvet love

But being thankful isn't just about the good stuff in life. True thanksgiving is even about the rainclouds and thunderstorms. Because by those moments, it shapes who we are now. So I am thankful for them too. I realized today that during the times that are harder, I am actually more lucky. The fact that during those difficult moments I can have faith in myself, in God, in the people around me, is more meaningful and incredible than having an easy and happy life. So I am ever grateful that I am still standing, no matter the circumstance.


red velvet love
red velvet love

Today I would also like to celebrate my friend Minsoo's birthday! Happy Birthday, baby! You'll always have a special spot in my heart! ;) I hope you have an exciting year with lots of adventures and victories! Love you and I'll be praying for you!

red velvet love

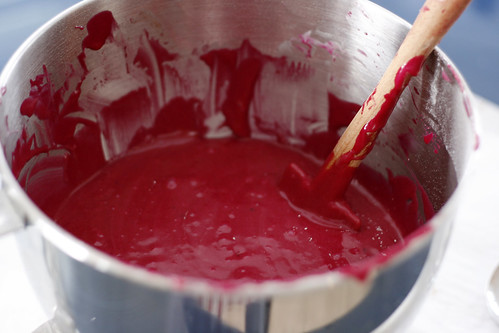
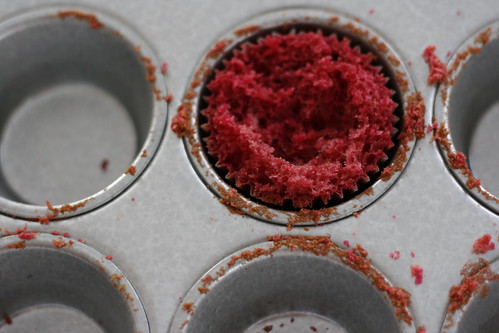
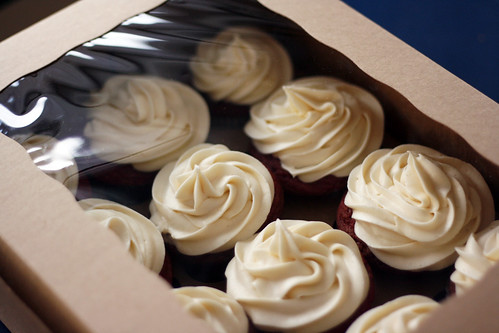
Okay okay, now that I got the ooey-gooey stuff and birthday shoutouts done, let's talk about these red velvet cupcakes. It's a new recipe: I thought it was about time for me to try another one. I saw this on Martha Stewart a while back where the guest was famous in the South for her red velvet cake. She actually doesn't put any cocoa powder in it at all -- she likes it brilliant red. Plus instead of butter, she uses vegetable oil, which I think gave it a pretty fluffy texture. Great!
red velvet love

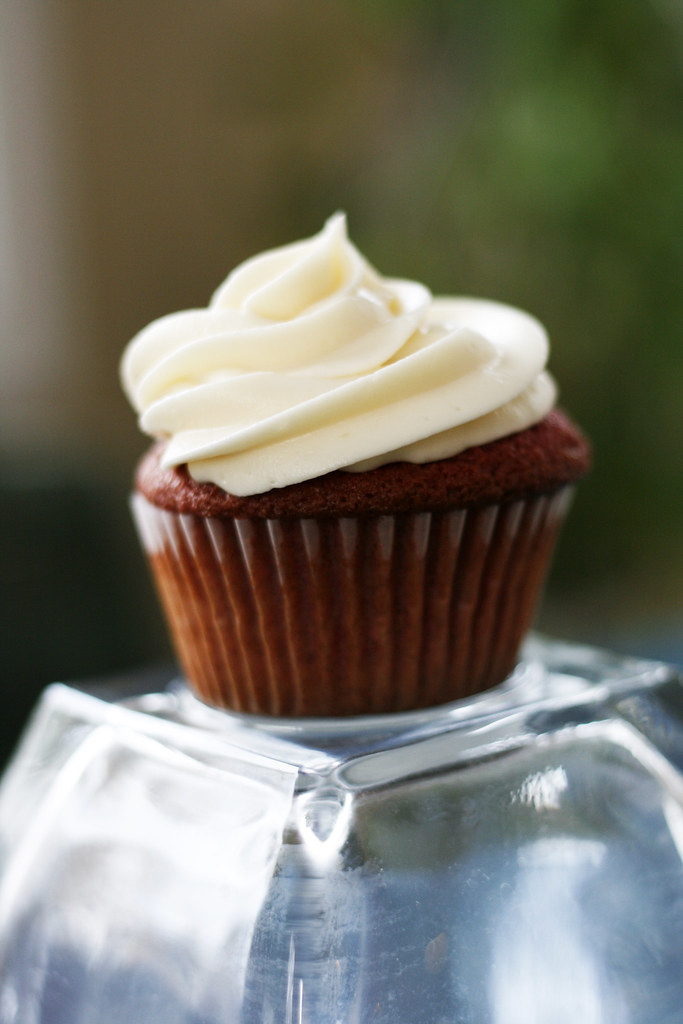
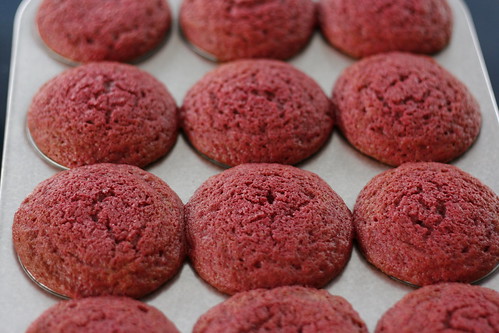
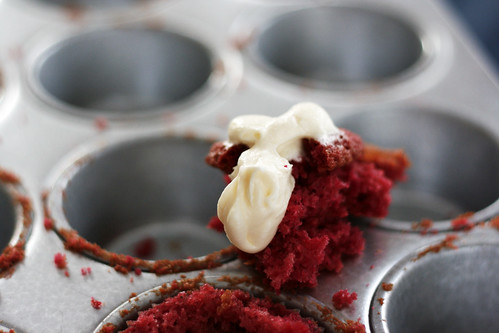
BUT! These cupcakes are proof that I am still such a novice baker. Everything was really easy and great except: these babies aren't so cuppy-sized at all!! I made them ginormously giant-sized. And totally my fault. When I was diving the batter, I used my usual ice cream scoop but the batter being more watery, it seemed to scoop a lot more than usual. So most of the cups were filled like 90% to the top! It should be around 2/3 full, and even though I knew it looked very wrong, I just went with it anyway. Bad idea. They turned out huge, awkward and with big crusty muffin-tops. Hahaha!

red velvet love

I also tried to be a little rebellious and decided to squeeze in some cocoa powder... which I don't think was the best idea. I used dutch processed cocoa (cuz that's the only kind I had at home), but apparently dutch processed cocoa isn't good for red velvet cakes because of the counter acidity and such and such.. which just means that it results in a less brilliant red. The cake in Martha Stewart's recipe is a bright deep red, but mine was a blotchy pink. Heeehee. Hey but it's all about experimenting and learning, right?

red velvet love

But don't get me wrong. They tasted wonderful and it had a great crumb. I will definitely use this recipe again. The people at the party loved it and once again I somehow made it look like I was an expert baker. :P No way! I've got such a looong way to go and I'm enjoying every bit of it!

Red Velvet Cupcakes

2 dozen normal sized cupcakes
from Martha Stewart

ingredients

2 1/2 cups self-rising flour
teaspoon baking soda
1 1/2 cups sugar
1 1/2 cups vegetable oil
2 large eggs, lightly beaten
1 teaspoon white vinegar
1 teaspoon pure vanilla extract
1 cup whole buttermilk
2 1/2 tablespoons red food coloring
Cream Cheese Frosting


directions

1. Preheat oven to 350 degrees. Line two cupcake tins. Set aside. In a medium bowl, sift together flour and baking soda. Set aside.
2. In a medium bowl, combine sugar, vegetable oil, eggs, vinegar, and vanilla. With an electric mixer, beat until light and fluffy, about 2 minutes. Gradually add flour mixture, and mix on low speed just until flour has been incorporated. Slowly add buttermilk. Add food coloring, and beat to combine.
3. Divide batter among cupcake tins; each about 2/3 full. Bake until a cake tester inserted into the middle comes out clean, about 18-20 minutes. Remove the pans to a rack to cool.
4. When completely cooled, frosting with cream cheese frosting.


Cream Cheese Frosting

for 2 dozen normal sized cupcakes


ingredients

1 stick butter
8-oz cream cheese
3 cups sifted confectioner's sugar
1 tsp pure vanilla extract


directions

1. In a bowl of an electric mixer, beat butter and cream cheese until well mixed. Add vanilla extract. Sift in 1 cup of confectioner's sugar and beat until combined. Then sift in the remaining sugar and mix until consistency is smooth and thick, about 7 minutes.


red velvet love

Saturday, November 15, 2008

Get the Sensation!


i am a huge fan of peppermint patties.
i am a huge fan of mint chocolate chip ice cream.
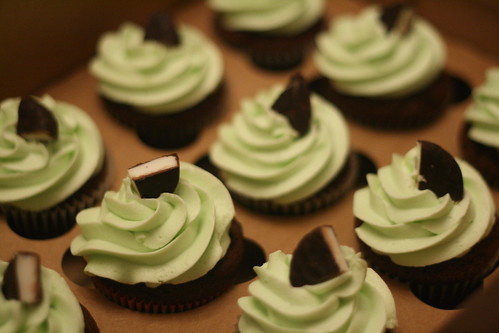
and i am a huge fan of mint chocolate cupcakes!

peppermint patty cupcakes

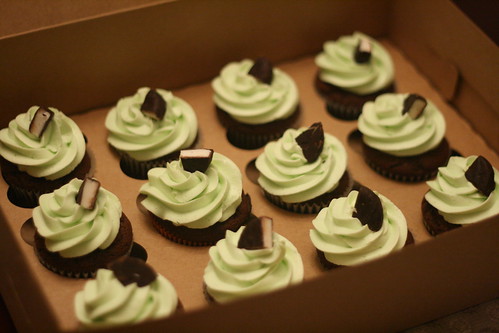
yes yes. i have baked again. and i think it was a success! :)
i went to my close girl friend's birthday party and i brought over some fresh baked cupcakes (which actually became quite a tradition. i brought her cupcakes for two years now). so anywho. i wanted to do something different. i always do either vanilla or red velvet (which is a popular flavor) but she's a little more sophisticated. heehee.

peppermint patty cupcakes

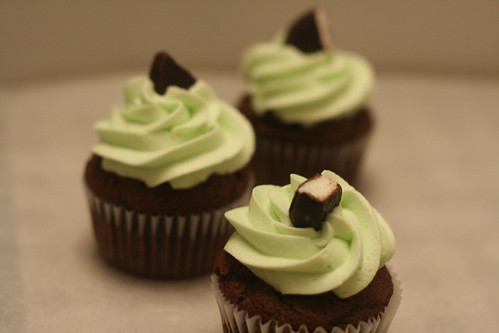
anywho. the cool green mint buttercream was a fantastic compliment to the light chocolate cake. i like this cake because it's very easy to make. the other chocolate cake recipes i have usually involves double boiling bittersweet chocolate and then mixing it with some coffee or espresso (which i would have to brew) and then some more stuff. this one is an old fashion chocolate cake and just involves good cocoa and some milk. how easy!

peppermint patty cupcakes

so the reason i call this a success is because not only did i get some delightful rants about it, i got some business! one of her friends are getting married and is looking to order! :) heehee. that ALWAYS feels nice. im so very thankful and humbled when someone takes interest in my goodies. i just love baking them, so thanks for eating them, you know?

alritey. i think that's about it for today. here is the recipe.

Old Fashion Chocolate Cupcakes

makes about 30 cupcakes
cake recipe from cupcake bakeshop


ingredients

1 cup (2 sticks) butter, room temp
2 1/2 cups sugar
4 large eggs, room temp
1 1/2 cups flour
1 teaspoon baking powder
1/2 teaspoon baking soda
1/4 teaspoon salt
1 cup unsweetened cocoa powder
1 cup milk
2 teaspoons vanilla


directions

1. Preheat oven to 375 degrees.
2. Beat butter until softened. Add sugar and beat until light and fluffy, about 3 minutes.
3. Add eggs, one at a time, beating until well combined.
4. Measure the flour, baking powder, baking soda, salt, and cocoa powder into a small sized bowl and whisk to combine.
5. Measure out the milk and vanilla and stir to combine
6. Add about a third of the dry ingredients to the butter/sugar and beat to combine. Add about a half of the milk/vanilla and beat to combine. Continue adding, alternating between dry and wet and finishing with the dry.
7. Scoop batter into cupcake cups about 1/2’s full. Turn oven down to 350 degrees and bake cupcakes for about 20-22 minutes or until a cake tester comes out clean.


Mint Buttercream


ingredients

1 1/2 cup (3 sticks) butter
4-5 cups powdered sugar, sifted
1-2 tbsp meringue powder
1/4 cup milk
1/4 tsp all natural peppermint extract
1/8 tsp green food colour gel (optional)
7 mini peppermint patties or any mint candy for decoration(optional)


directions

1. Beat butter until creamy, scrape bowl.
2. Add 2 cups of sifted powdered sugar, milk, and peppermint extract, beat until combined.
3. Add meringue powder and remaining powdered sugar (cup at a time) as needed to get piping consistency. (Make sure you beat it for a good 5-7 minutes). Add food coloring if wanted. Decorate with candy.


for more photos, check out my flickr